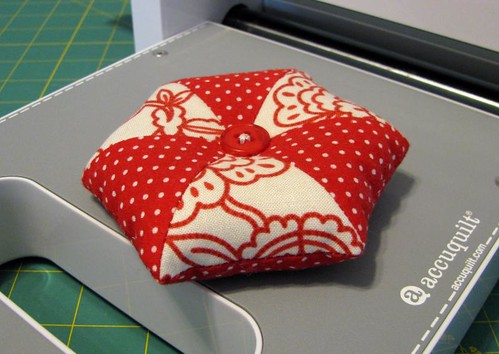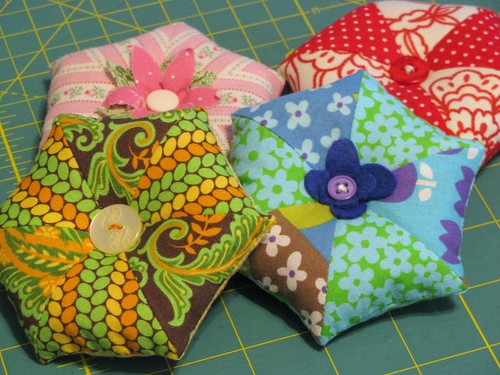
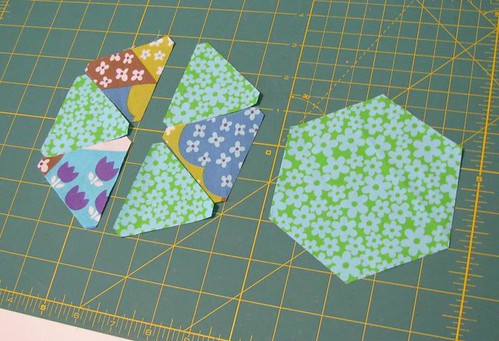
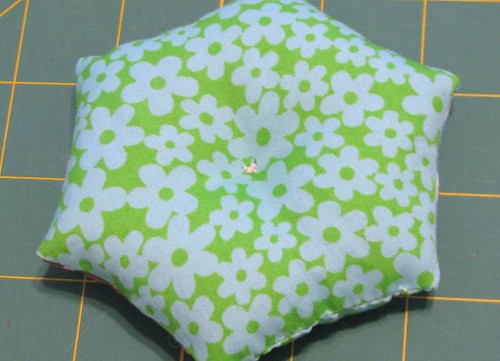
When I first talked about the dies AccuQuilt sent me, I mentioned that dies like the Equilateral Triangles and Hexagons were designed to work together. If you sew six of the triangles together, they’re the same size as the corresponding hexagon—and that’s really all there is to this pincushion! But I’ll walk you through the details.
For most of the pincushions I’ve made so far, I used two different fabrics (longtime readers may recognize scraps from my Hilltop Drive quilt for Stitch), but you could also make it scrappy with a different fabric for each triangle. In my next post I’ll show you how I matched the stripes up using just one fabric for the pink pincushion.
Each of these dies has three sizes of the shapes; this tute uses the biggest ones, but the process would be the same to make a smaller pincushion with the smaller shapes.
What you need
- Scraps of fabric for triangles, each at least 3×3"
- 4½×5¼" scrap of fabric for backing
- AccuQuilt GO! Equilateral Triangles Die (55079)
- AccuQuilt GO! Hexagons Die–2", 3", 5" (55011)
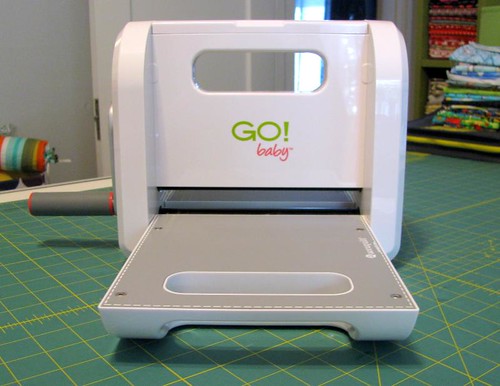
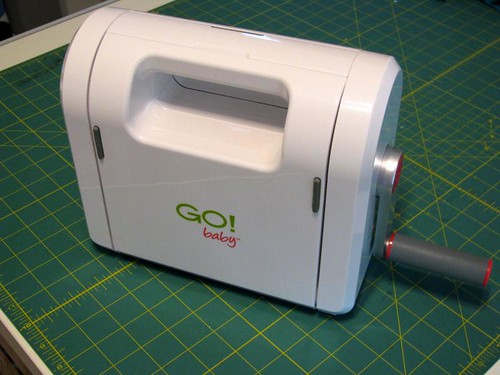
- AccuQuilt GO! or GO! Baby die cutter and 6×12" cutting mat
- Ground walnut shells (sold by pet stores as bird litter) or other filling
- Button
- Extra scraps of fabric or felt for flower embellishment (optional)
- Needle and thread, sewing machine, and the other usual suspects
How to make it
Seam allowances are ¼". Sew all pieces with right sides together unless otherwise specified.
- Using the dies, cut out 6 large triangles and 1 large hexagon. I cut 3 triangles from each of my fabrics. Arrange the triangles to form a hexagon, alternating fabrics. Try to align the fabric’s grain with the dies’ blades so at least one edge of each piece will be on the straight of grain.
- To avoid Y-seams, sew the triangles together to make 2 half-hexagons, 3 triangles each. (Use a short stitch length if you’re filling with small particles like walnut shells.) Chain-piecing makes this super easy: sew the first 2 triangles from the left half-hexagon, then the first 2 triangles of the right half-hexagon, then add the third triangle to the left section, then the third to the right. Press the seam allowances in opposite directions for each half-hexagon.

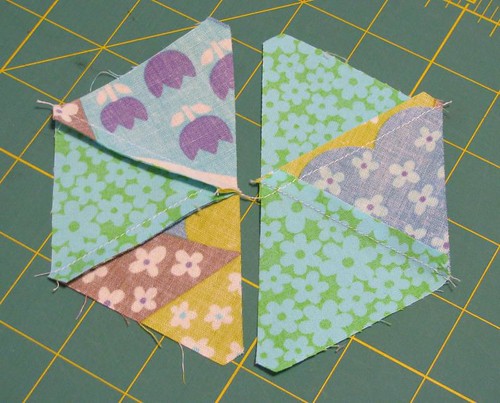
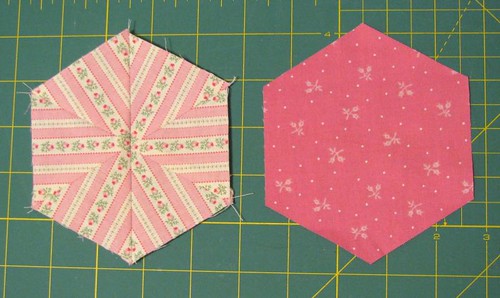
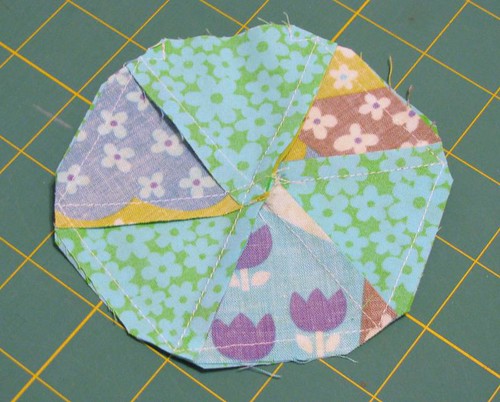
- Put the half-hexagons right sides together, matching up the outer edges and the seams. Pin if desired (I just rely on my machine’s dual feed for small projects like this), and sew the half-hexagons together on the longest edge. Press the seam allowance to one side. You should have a pieced hexagon equal in size to the die-cut hexagon, and thanks to the blunt corners of the triangles, no dog ears to chop off. I forgot to take a picture of this for the blue and green pincushion, so here it is in pink:
- Put the pieced and die-cut hexagons right sides together. To help turn the open edge in after filling the cushion, start sewing perpendicular to the edge, sewing in ¼" and then pivoting 90 degrees to sew the actual seam. This photo shows the stitching at the start of my seam on the left, and the presser foot is positioned to sew out to the edge the same way after sewing all the way around the hexagons:
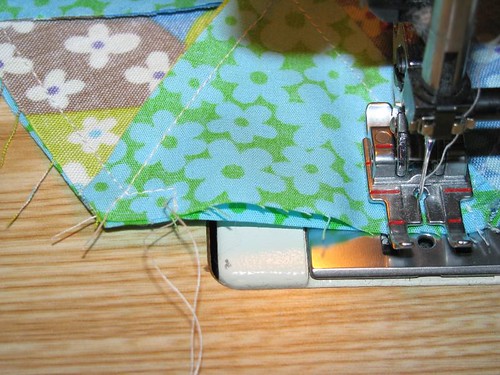
Leave a gap as shown for filling, and sew the hexagons together using the triangle seams as guides for where to pivot at corners—when your needle meets the stitching, leave it down in the fabric (shown below), lift the presser foot, pivot to sew the next side, put the foot back down, and keep going until you get back the triangle you started on (finish the end as shown above).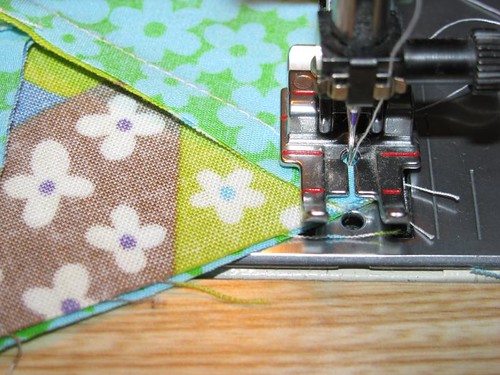
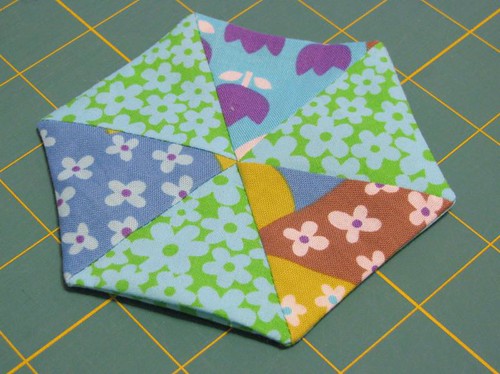
- Clip the corners (and pretend my seams are perfect).
- Turn the cushion right side out through the gap, using a chopstick or other blunt tool to gently push out the corners, then give it a quick press. Looks much tidier this way, no?
- Spoon walnut shells into the cushion through the opening. You may want to set the cushion in a small box or bowl to catch any shells that go astray. Walnut shells are supposed to act like emery to sharpen pins, and I also like that they give the pincushions a little more heft than polyfill. A 7-pound bag of ground shells cost me about $10 at the pet store and is way, way, way more than I needed for all four of these cushions; I’m going to share the remains with anybody at my quilt guild who wants to make pincushions for our quilt show shop. Anyway, stuff the pincushion as full as you’re comfortable with, but make sure there’s a little give so you can cinch through the center without bursting seams and showering your sewing space in nut shells. Then ladder-stitch the opening closed.
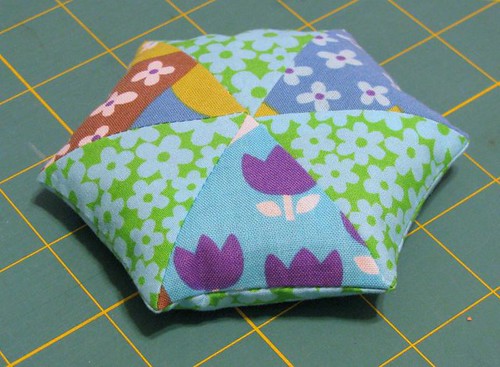
- If your button isn’t particularly dazzling, cut a flower or two from felt or fabric and center it right side up on the top of the pincushion. Using strong thread, sew the button centered on top, sewing all the way through the pincushion to cinch it in the middle. The stitches on the back may want to pull the weave of the fabric open if your cushion is heavily filled; if you prefer, sew through another small button on the back to support the stitches.
All done! You can probably whip up a cushion faster than it took to read the instructions.
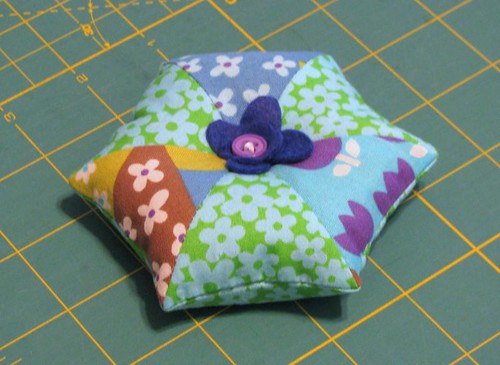
These pincushions would be great foundations for embellishing further—you could insert rickrack in the side seam or put more elaborate fabric flowers on top, or even just use a fancier button than I had in my stash. Leave a comment if you have other ideas!
If you’ve got a charity event coming up, feel free to make bunches of ’em to sell—the combination of scrap-friendliness and quick die cutting means they can be cranked out efficiently.
As mentioned above, stay tuned for details on how I marked up my die to fussy-cut striped fabric…and to learn how you could win your own Go Baby cutter and dies from AccuQuilt!