
A few weeks back, I spent the weekend stitching with some women from my quilt guild. This was the perfect excuse to finally get some needleturn projects going that had been languishing in set-up phase. While I was gathering all my bits and bobs to shove into my quilting-to-go bag, I came up with my new favourite quilting tool. Keep your bobbin winders and your Thangles; I'm all about the clipboard.
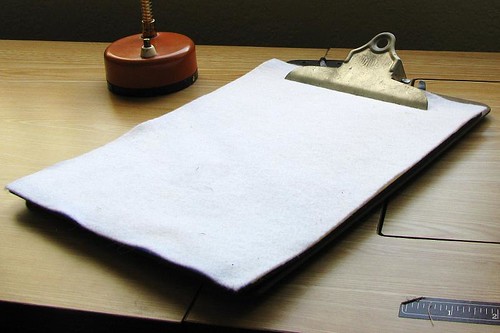
Yes, a boring old clipboard is the current apple of my eye. Mainly I needed a sandboard, something the Mother has for keeping fabric from stretching while tracing appliqué shapes. She also makes crude versions by spray-mounting a sheet of sandpaper insider a file folder. And while this is a clever trick, I wanted something a little sturdier. I clipped a sheet of sandpaper to a clipboard, and behold! There it was. But my thoughts kept drifting to other 9" x 12" accoutrements to trick out the board with. So I now present my (Almost) All-Purpose Appliqué Board. This may seem like a long-winded tutorial for a tool that's really pretty simple, but the sequence of the stack is important to access everything properly.
- You'll first need a letter-sized clipboard. Mine cost all of 39¢ at a thrift shop.
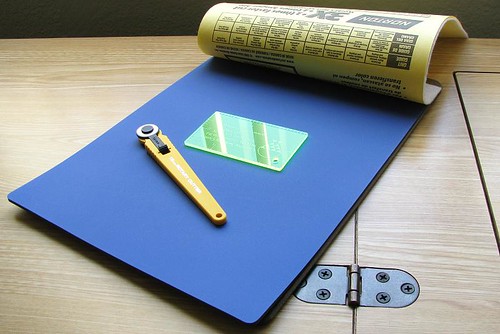 A self-healing cutting mat is the first layer of the board, useful for cutting out appliqué pieces with an 18mm rotary cutter and, for straight lines, a credit-card-size ruler (a much appreciated freebie from a local quilt shop). I happened to have a 9" x 12" mat on hand, but they can be tricky to find. Here's a Fiskars one punched (but too tall) to fit in a three-ring binder, an X-Acto 8.5" x 12" mat, or an 8.75" x 11.75" one from Omnigrid. You might be able to use a cut-out section from an older mat instead. My ungridded mat came from a start-quilting combo pack (can't find anything to link to, sorry) that I bought so the Other could have his own rotary cutter (it was a pretty crap gift, since I kept the cutting mat and the ruler for my own evil purposes and am now eying up the cutter for permanent pinking blade installation). When clipped, the cutting mat will probably be a little longer than the clipboard, but it's stiff enough that it shouldn't matter.
 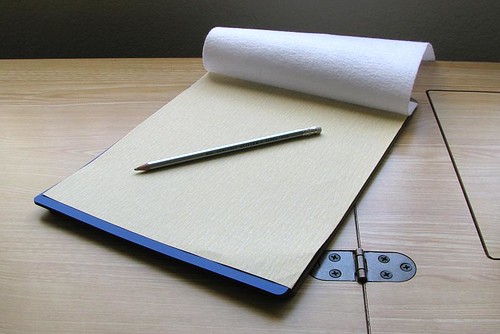 On the cutting mat goes a sheet of sandpaper. Standard sheets are about 9" x 11", so they'll fit right over the cutting mat. Put your fabric down against the sandpaper when tracing around a template, and it won't slip and stretch as much.
 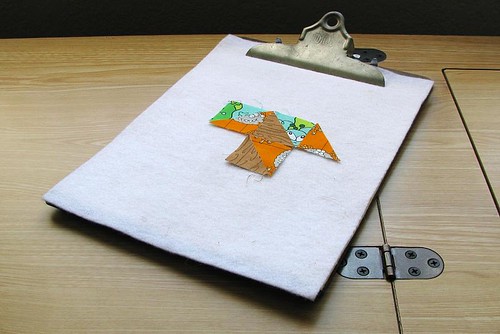 Put a sheet of white felt on top of the sandpaper. No need for fancy wool—one of the precut sheets of acrylic craft felt will work perfectly. This can be used as a mini design wall for laying out whatever block you're working on. I use it when I'm gluing the pieces down onto the foundation.
 - I'm also planning to try adding an overhead transparency with a block design printed onto it to help position the pieces on the foundation. The felt will help keep the foundation in place while using the overlay.
- Clip everything into the clipboard. You just have to lift back the layers to get to the one you need. If there's any info you refer to frequently, you could stick it on the back of the clipboard. Templates can be tucked between the layers so they don't get scrunched in your workbag, and you can even leave fabric bits stuck to the felt layer during transport if you're not too rough on the board.
Simple, right? I've been using it quite a bit at home for working on appliqué in front of the TV.
So why is it only almost all-purpose? Well, there's no ironing surface. You can't press on it. I'm sure some industrious someone could come up with a way, but for something cobbled together from what I had lying about the sewing room, I'm pretty satisfied.
7 comments:
clever - you could try to add the ironing surface to the back - ala June Taylor... (Probably more trouble than it is worth...)
I love it! So smart, useful, and simple. Brilliant.
Thanks for that great idea. Now we can all work smarter...not harder!
I love this! I might include a see-through page protector that I can drop my pattern and prepped pieces into.
I'm going to make this! I just need to figure out how to cut down an old cutting mat. Glad I saved it.
Such a great idea! I'll be linking to this. I'm thrilled to have found your blog!
Thanks everybody—so glad this is useful to you guys too.
@threeundertwo: The page protector idea sounds great! I already store cut-out templates and patterns in them, so I don't know why I didn't think of clipping them right in. I'm wracking my brain to figure out where I read how to cut the mats up...I'll let you know if it comes back to me.
This is a great idea! I never would have come up with this on my own. Simple but effective. I love it.
Post a Comment