Pages

Showing posts with label sewing. Show all posts

Monday, February 15, 2016

Good questions: sewing machines for beginners

Adjusting a Janome 8900 on the set of my Craftsy class

A visitor to my website recently asked me to recommend a good beginner sewing machine, and she specifically was interested in appliqué. In case anybody else has similar questions, I thought I’d share some of my experience with machines here.

My first advice would be to talk with an independent dealer (preferably one who stocks multiple brands), who will help you figure out the right machine for your plans and budget. I use a Janome these days, and I’ve heard good things about their entry-level machines, but there are plenty of other good makes out there. To some extent, you get what you pay for: the sub-$100 models in discount stores probably aren’t going to get you very far, though you needn’t start with one of the $10,000 numbers that has more in common with R2-D2 than with Grandma’s Singer. And keep in mind that you never know what you might find secondhand, though in my experience the best deals come when you aren’t looking.

In my ten years sewing, I’m on my third main machine:
  1. White 2037: an all-mechanical model with a good range of functions. The Mother bought it for me with the idea I’d sew some curtains and pillows, for which it was well suited. Had we had any idea I’d get into quilting, she might have picked a different machine, but the White did have a quarter-inch piecing foot standard, so it was easy for me to start piecing without extra accessories. I pushed the limits of the machine with appliqué, for which it was perfectly capable but lacking the bells and whistles to make things easier (see below).
  2. Pfaff 1171: I scored an incredible deal at a thrift store on this machine from 1986. At the time, sewing and quilting had become the better part of my job, so this workhorse machine was a godsend. The built-in dual feed was a major upgrade over a walking foot, and the needle-down function was a big help with appliqué. This machine hardly ever met a seam it couldn’t sew, and at the risk of sounding like a grumpy old man, they just don’t build them like that anymore. Sadly, a dodgy repair fried its motherboard.
  3. Janome 8900: this, my current machine, was the first one I carefully chose knowing the kind of sewing I do. I wanted to retain the Pfaff’s the power and reliability (reliable until it wasn’t, that is!), which led the dealer to recommend this machine. I spent several hours in the showroom with a very patient and knowledgeable dealer, who really listened to what I needed from the machine—my top advice is to find a dealer who wants you to be happy with your machine, not just a dealer who wants to sell you something. You’ll be able to tell the difference. While I’d never suggest choosing a machine because of how many decorative stitches it has, I was looking for an updated stitch selection, including the blanket stitch and appliqué blind hem that were missing from my Pfaff. This Janome came with a dual feed that was arguably more flexible than the Pfaff’s, it had a nice wide throat for quilting (most of which I do myself), and it feels cosmically in tune with me when free-motion quilting.
I used each of these machines for raw-edge and prepared-edge machine appliqué techniques. All the projects in my book were sewn on the Pfaff, and the Janome is what I now use at home and on camera in my Craftsy class.

An adjustable zigzag is really the bare minimum you need to do all kinds of machine appliqué. For a list of features that can make appliqué easier, take a look at this free excerpt from my book, The Quilter’s Appliqué Workshop. What machine features do you appreciate for appliqué?

Friday, November 27, 2015

What's on your playlist?

Thanksgiving isn’t a very big deal round here, mainly because our family is on the other side of the country. But the Other and I are always happy to have some time off from regularly scheduled programming, and though working for myself means never being caught up—there’s always some quilt I should be sewing, or a pattern I should be writing—I like to take advantage of the long weekends to indulge in my playlist.

Not a music playlist, but a crafting or needlework playlist. It’s easy to get caught up with whatever sewing I need to do for my work commitments, which takes away from the joy of creative exploration just for the fun of it. So I try not to let myself feel guilty when I work on projects that are just for play, and I always have an active “playlist” on the go of things I can pick up to work on when I just feel like sewing. Or embroidering. Or weaving. Or whatever—just creating.

But you don’t have to be a pro crafter to benefit from a playlist. Any kind of high-volume, deadline-based crafting can lead to burnout. Lots of quilters are extremely generous with their charity sewing, and this time of year especially handmade gift-giving obligations can get overwhelming. Even just feeling like every project has to be finished or have a purpose can take the fun away. I think taking a break for some play projects actually energizes the “work” sewing. Here’s some of my play. (Affiliate links included where appropriate.)

Needle threader shisha sampler

I add to this freeform shisha-embroidery sampler whenever the mood strikes, which is usually when I have new threads to try out. It lets me play with fibers and stitches without worrying that I might “ruin” something that has to get photographed for publication. But these experiments can and do lead to ideas that get used down the road, so it’s actually a useful exercise. Oh, and if you couldn’t tell, those are the tops of needle threaders instead of actual shisha mirrors. I’m fascinated by the different obscure faces on them but I don’t very often use a threader, so they might as well get stitched down!

Vintage bargello

I found this 1973 bargello needlepoint kit several years ago when visiting my parents. Embroidered with super-chunky yarn, it was already partially finished, so it was a relatively simple job to fill in the rest of the pattern. I just worked on it when I didn’t have appliqué or other handwork to do while watching TV. Maybe someday I’ll finish it into a pillow; maybe not. There are no obligations on the playlist!

Pigeon No. 1

I’ve mentioned my fondness for pigeons before. Correct me if I’m wrong, but I don’t think there’s a big market for pigeon quilt patterns, so this appliquéd pigeon was just for me and just for fun. Before starting him, I’d sewn a quilt of yarn-dyed stripes for Stitch, and though the quilt was simple, I’d loved sewing it because it was such fun to fondle all the woven fabrics. I wanted more, so I started amassing shot cottons and shirtings in enough shades of grey to make a pigeon. But he only suggested more pigeons: scruffy pigeons. Fat pigeons. Pigeons wearing top hats. Pigeons made of silk. A whole series of pigeons.

Pigeon No. 2

The second pigeon stayed with yarn-dyed cottons and continued my experimentations (in other projects) with irregular English paper piecing. I’ve been delighted with the exploding variety of yarn-dyes available, and was able to include some slubbier ones in this pigeon, as well as some extra tasty Oakshott Cottons. Some of the tiny triangles in his feet were fairly challenging, but that was part of the fun. (Obviously he still needs an eyeball.)

Use your playlist to explore a new craft—for me, weaving.

The Other’s keen eye for thrift-store bargains has netted me a range of secondhand looms, so my playlist also includes tinkering with weaving. Sewing, quilting, and embroidering share a lot of tools and methods, but weaving’s a whole other thing, which I have no training in—but learning about it really engages the creative juices. So I’m going to take advantage of this weekend’s Black Friday sales to stock up on some weaving instruction. Pickup Stick & Finger Control Techniques looks intriguing on Craftsy, where all classes (including quilting!) are on sale for $19.99 and under. And Interweave’s $5.99 ebooks and videos sounds like the perfect opportunity to indulge my curiosity in inkle weaving. I may be a quilter by trade, but one point of the playlist to encourage such indulgences—you never know where they might lead.

So what’s on your playlist?

Monday, June 08, 2015

50 Fat Quarter Makes Blog Hop

Today it's my turn on the 50 Fat Quarter Makes Blog Hop! I'm posting late in the day because I'm busy (and having a blast!) teaching appliqué with Sandra Mollon at a week-long quilt retreat on Lake Tahoe. So I thought I'd share some of the beautiful scenery along with my projects from the book, which is filled with projects made from 1 to 10 fat quarters.


Quirky Pencil Case (2 fat quarters)


The diagonal zip gives this simple pencil case a bit of a twist. The second fat quarter makes the lining; the two fat quarters give you enough to make three pouches.

Striking Pocket Organizer (4 fat quarters)


Fussy-cutting symmetrical designs from the fat quarters makes the fabric the star in these simple wall pockets.

Retro Ring Placemats (6 fat quarters)


The freeform, interwoven bias rings are a version of the technique I'm demoing for the retreaters tomorrow morning! Designing the pair of placemats was kind of a puzzle to squeeze out two placemat tops, two backs, binding, and the bias strips from the six fat quarters while keeping a variety of fabrics in each mat.

Check out the book for another 47 fun projects, and keep following along with the contributor blog hop!

Tuesday, May 06, 2014

Stitch ’n Swap Blog Party

Have you been following Generation Q’s Blog Party to celebrate the release of their new book? It’s Stitch ’n Swap: 25 Handmade Projects to Sew, Give and Receive, and I’m on today’s party circuit!

My contribution to the book was a pair of potholders made from a version of Rail Fence blocks that reminded me of parquet floors—hence the alliterative project title, Parquet Pot Holders.


Though they look quite different, both of the potholders were made from exactly the same block structure. In bare black and white, it looks like this:


Not much to it when stripped down, but there’re loads of ways to dress it up! I envisioned a swap or guild challenge in which participants would all use the same basic design and “color it in” with different fabrics to show the versatility of the block. To make sure it was doable, I challenged myself to come up with some other designs for the same potholder block. These are just solids, but the possibilities multiply even further when using stripes and other prints.


Make sure to check out GenQ for the rest of the blog party and to enter to win your very own copy of the book. Good luck, and happy swapping!

How does this giveaway work?

I'm so glad you asked. Comment on the original Generation Q Stitch 'N Swap post letting us know if you've ever participated in a swap and the coolest thing you've ever gotten in a swap. That's it!

All winners will be chosen from the Generation Q Magazine post Wednesday May 7th and posted Thursday May 8th.

Stitch ’n Swap: 25 Handmade Projects to Sew, Give and Receive
compiled by Jake Finch of Generation Q
$17.95
112 pages

Get a signed copy from GenQ

Monday, May 05, 2014

Photo catch-up

It’s been a wild couple of months with a very full schedule—lest you think the piles of fabric and paperwork of my sewing room has finally swallowed me whole, here’re some shots from the more fun moments. (The paperwork piles are very real, but no fun, so I won’t subject you to them.)

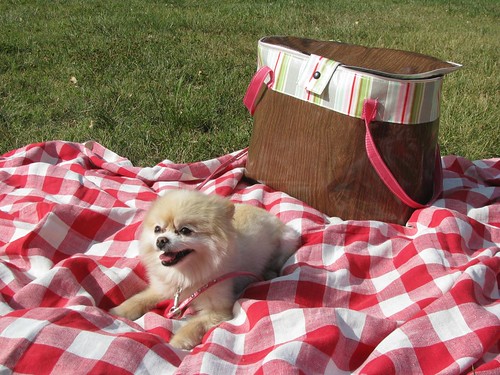
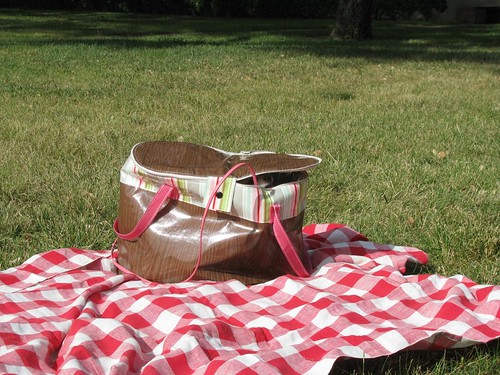
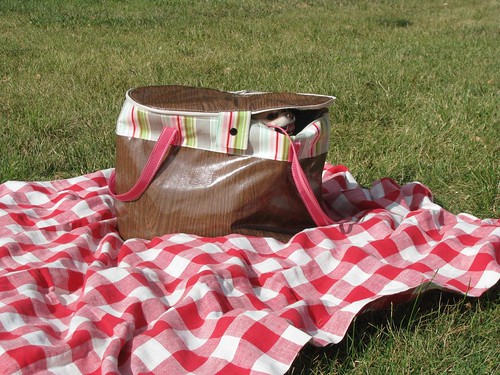
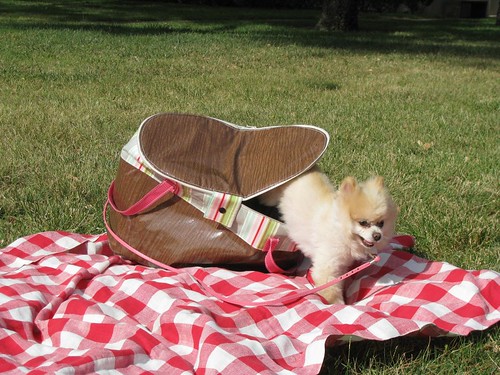
Pomeranian in a picnic basket

Spring means picnic time with Miss Fluffinstuff! We couldn’t resist putting her in the oilcloth picnic basked I sewed for Stitch.

Pomeranian in a picnic basket

Pomeranian in a picnic basket

Pomeranian in a picnic basket

Pomeranian in a picnic basket

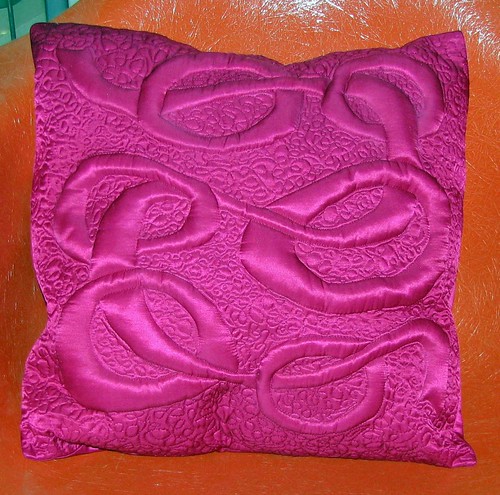
I’m teaching next week for Quilters Anonymous near Seattle, so I just finished a new trapunto pillow class sample…

trapunto rings pillow

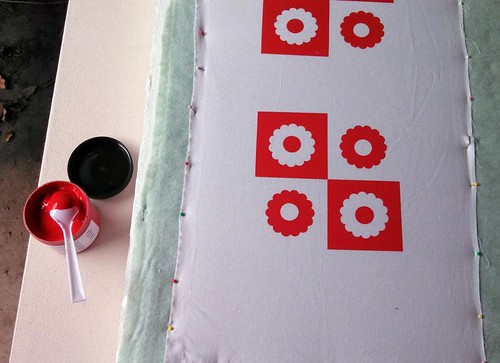
A while back I stole a few minutes for a trial run of some screen-printing on fabric—lots of fun!

screen-printing test

I’m really itching to sew something with the test swatch, and my head’s buzzing with ideas for designing and printing fabric. Sometime this summer I’m going to have to take a vacation to the print studio (that is, our garage) for some uninterrupted playtime. But not until after Quilt Market!

Monday, February 03, 2014

Mid-Century Monday: Boby taboret for sewing storage

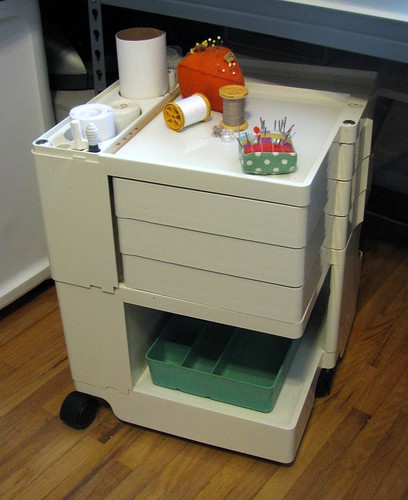
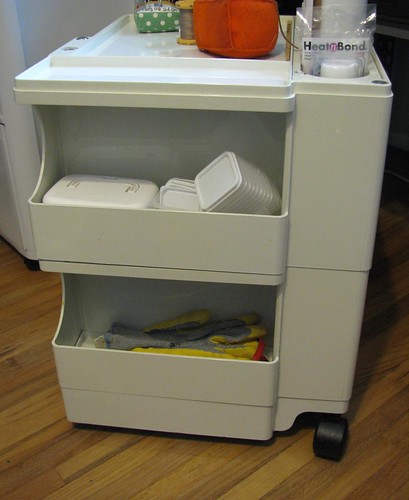
The Other found me the best present ever! He spotted this organizer in a thrift store and thought it might be helpful for my sewing bits and bobs. “If you don’t want it, it was only $2,” he said, since it was fairly covered in paint, scuffs, and grime. He didn’t know what he’d scored, nor did the shop that priced it! (All photos are after cleanup.)

Boby taboret for sewing supplies

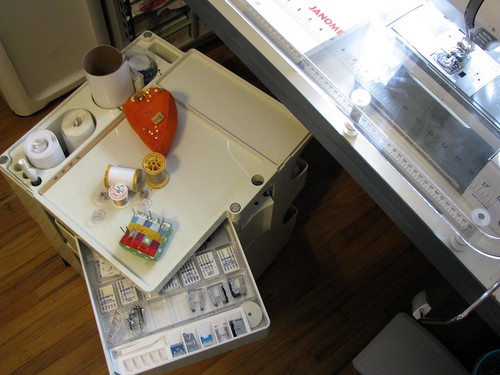
So what is it? The sorter in me is delighted with its functional features, but I also knew straight away that it was not just any organizer, but a classic Boby taboret, designed in 1969 by Joe Colombo. The space-age styling and practical compartments have long appealed to me, but the $300 pricetag for a new version kept it strictly in the realm of covetousness. (Of course, 45 years in production, then as soon as I look it up to check the current price, nobody’s selling it.) So after a once-over with a damp cloth and a twice-over with the same stuff I used to clean up my Genie, there’s an authentic piece of mid-century modern design in my sewing room, all the more exciting for being such a bargain!

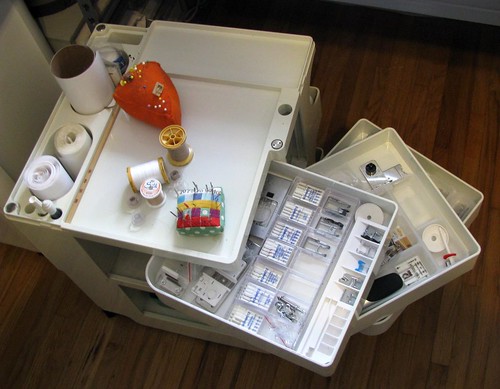
Boby taboret - drawers open

Mainly designed and/or sold for fine artists, the brilliance of Boby is that he’s chock full of compartments of different sizes and configurations—much more useful than a stack of same-size drawers. There are tiny wells for paintbrushes, deep ones for rolls of paper, bulk cubbies for chunky stuff, and shallow drawers for small pieces. In other words, perfect for sewing supplies!

Boby taboret for sewing supplies

Rather than floating around the room at random, rolls of fusible web, freezer paper, and stabilizer can live in the deep sections, along with my slippery quilting mat. Instead of brushes, a seam ripper and screwdriver are kept close at hand. And the flat top gives a surface to corral spools, bobbins, and any of those other current-project things that tend to float around a sewing table. My Boby’s shorter than the standard model, so he rolls right under the sewing table when not needed.

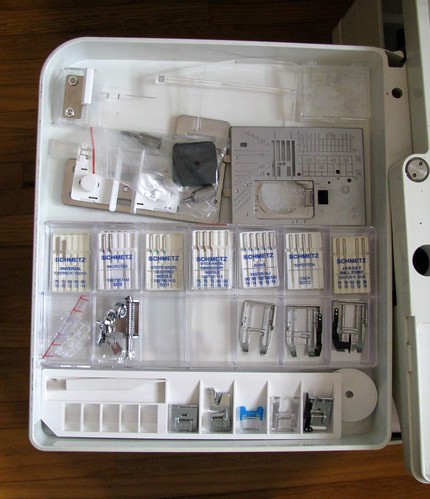
Boby taboret - top drawer

But the drawers—oh, the drawers! My Boby model has three shallow swing-out drawers instead of two deeper ones. This is ideal for presser feet and machine needles. I’m constantly switching feet while I sew, and my Janome 8900 uses some fairly bulky dual-feed feet that now have a home of their own in the top drawer.

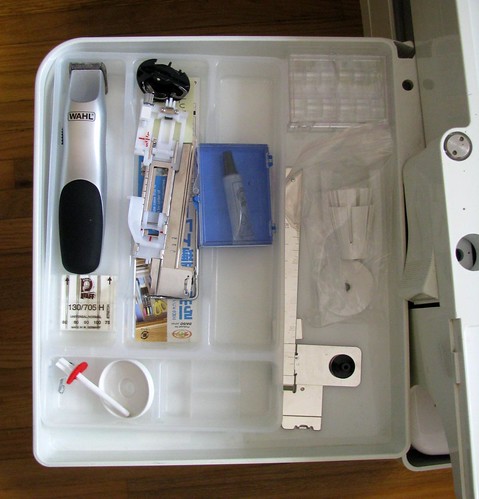
Boby taboret - middle drawer

Things like spare spool caps and spool pins live in the next drawer down—easy to get to, but tucked away. (Away from dust and curious cats, that is.) Bulkier machine attachments and occasionally used stuff is here too.

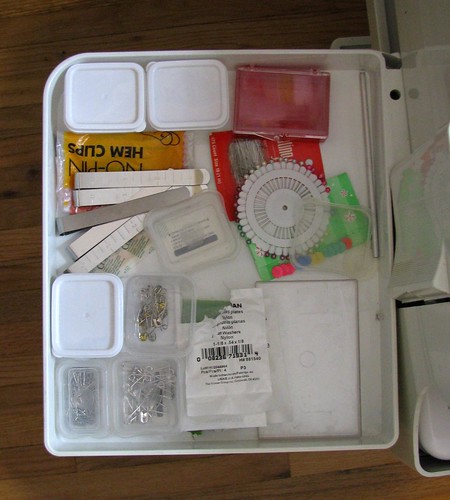
Boby taboret - bottom drawer

The bottom drawer holds various pins and clips. Like the fusible rolls, these previously didn’t have a proper home and wandered untamed around the sewing room. Just getting the rolls, pins, and presser feet in order was worth the $2.

Boby taboret - back

The cubbies round the back are just right for mid-size items like quilting gloves and a bobbin winder. They were always awkward when I had them in drawers with smaller items like thread spools.

Boby taboret - signature

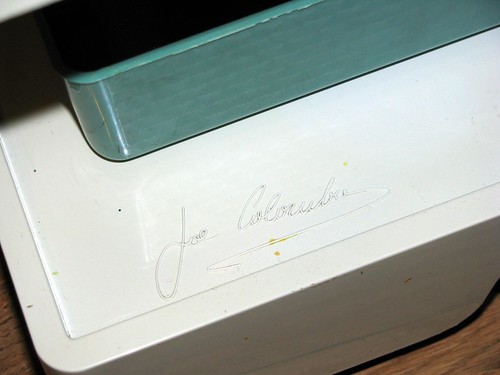
I haven’t decided on a definite purpose for the largest cubby at the base of the unit. There’s a molded signature down there proving Boby’s no knockoff—along with some bits of paint and ming I wasn’t quite able to get rid of, proving that this particular Boby’s no mere showpiece. I fully intend to continue using and loving him.

And though I tease the Other about his near-constant thrift-store circuit, I should probably just appreciate it! He scored another great mid-century find which I’ll share next time.

Monday, January 06, 2014

Christmas Catch-Up: Simple Needle Book tutorial

Simple Needle Books
Shhh, don’t tell the Mother! I made a version of this for her for Christmas, but shipping and travel plans got miscoordinated and she hasn’t got it yet. It’s just a quicky project I threw in with some other stuff for her, so the surprise shouldn’t be totally ruined.

Simple Needle Books
It’s not a fussy project—just a little something functional that can be prettied up as much as you like by choosing fun fabrics or embellishments. A sewist can never have enough pincushions, and spare needle cases don’t seem amiss to me either—inevitably I end up sticking needles in one of said pincushions and then losing them inside, so the more proper places for needles the better! (There’s a pocket for needle packets inside, so you can also keep fresh needles separate from their gently used brethren.)

Simple Needle Book

Finished Size

2½" × 4" (folded closed)

Materials

This project is great for scraps of fabrics and interfacing—I don’t know exactly what interfacings I used, ’cause I pulled bits from the scrap bin. You just want a combo of fabric and interfacing that’s slightly stiffer than floppy quilting cotton alone.


Instructions

  1. Fuse the medium-weight interfacing centered on the wrong side of the exterior fabric, following manufacturer’s instructions. Fuse the lightweight interfacing centered on the wrong side of the interior fabric.

    interfaced fabrics

  2. Fold the interior piece right sides together 5¼" from the right-hand short end.

    first fold to 5¼" wide
    Then fold the upper section back to form the pocket so the folded piece measures 4½" × 5½". Press to hold the folds.

    fold pocket back on itself

  3. With right sides up, place the felt on the unfolded section of the interior piece about ½" from the raw edges. Stitch the felt to the interior along the felt’s top edge; you can use a decorative stitch like I did here, but a straight stitch will work too—just be sure to secure the ends. I also trimmed the bottom edge of the felt with a scalloped rotary blade.

    felt needle pad attached with decorative stitch

  4. If desired, embellish the exterior. The interfacing is a handy stabilizer for decorative stitching—see my stitch guide for the combination of built-in stitches I used on the linen needle book shown at the top of the post.

  5. Put the interior and exterior pieces right sides together, making sure the pocket is still folded so all raw edges match. Sew around the perimeter with a ¼" seam allowance, leaving a gap for turning on the bottom edge, avoiding the pocket section.

    opening left in bottom edge to side of pocket

  6. Clip the corners and turn the needle case right side out through the opening. (If you’re paying attention, you’ll see that I wasn’t…)

    oops, I left my opening at the top rather than the bottom...no big deal
    Push out the corners gently and press flat, folding in the seam allowances at the opening.

    edges pressed

  7. With the needle case open (i.e., unfolded), topstitch along all outer edges, closing the gap in the bottom.

    topstitching keeps edges nice and flat

  8. Fold the needle case in half and press to set the crease in the center.

    finished needle book, closed

    finished needle book, open
That’s it! Stay tuned for a tute on ribbon appliqué, which I used on another of these needle books as well as kitchen towels.