Pages

Monday, December 22, 2008

Canuck Christmas cookies, Yankified

Would you let these two in your home?

Spending my first Christmas away from my family, I've been discovering that cookies were one of the biggest parts of my Christmases growing up. I'm not sure I'm even all that fond of this time of year, but as December started, I found myself hankering for the half-dozen types of cookies the Mother would bake annually. I pestered her for the recipes, and the Other and I baked up a batch of nearly all the old faves.

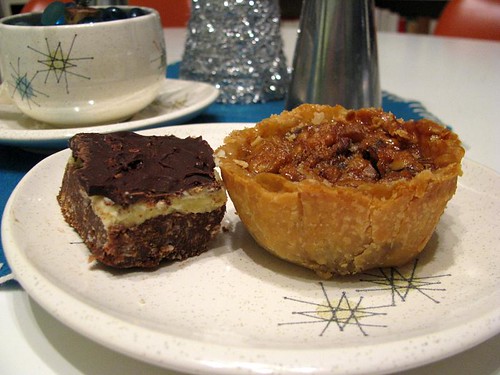
That includes two Canadian sweets you don't see very often round these parts. It wouldn't be Christmas without Nanaimo bars, and butter tarts bring a nice contrast to the chocolate that covers our cookie tray. The gooey butter tarts—similar in flavour to pecan pie—are the Other's new favourite indulgence. So if you haven't done all your baking yet, here's a couple recipes to try, with the Mother's Americanization tricks included.

Nanaimo Bars

The Mother's Canuck-in-Yankland Trick

Authentic Nanaimo bars use custard powder, which is virtually nonexistent in the States. Instead, use vanilla instant pudding mix, but add a bit of almond extract to get closer to the custard flavour.

¾ cup butter
¼ cup white sugar
1/3 cup cocoa
1 tsp vanilla
1 egg
2 cups graham cracker crumbs
1 cup coconut
½ cup walnuts (optional; we usually skip 'em)
2 Tbsp custard powder (or instant vanilla pudding mix)
1/8–¼ tsp almond extract (if using pudding mix)
3 Tbsp milk
2 cups icing sugar
6–8 oz chocolate chips

Melt ½ cup butter. Blend in the sugar, cocoa, vanilla, egg, graham cracker crumbs, coconut, and walnuts, if using. Press into a buttered 8" square pan. Refrigerate.

Cream the remaining ¼ cup butter with the dry custard powder or pudding mix. Add milk and icing sugar. Add almond extract if using. Blend together. Spread onto the bottom layer; return to fridge.

Melt chocolate chips in a glass cup in the microwave (6 oz is half a bag, but it can take a little more). Make sure the bottom layers are cold, then spread the chips on top.


Butter Tarts

The Mother's Canuck-in-Yankland Trick

The poor American excuse for corn syrup will do for this recipe, but Canadian corn syrup, more like English golden syrup, is better. So use golden syrup if you can find it. And avoid the temptation to use pecans if you're going for the real thing!

1 cup corn syrup (or golden syrup)
2/3 cup brown sugar
2 eggs, slightly beaten
¼ cup butter
¼ tsp salt
2/3 cup chopped walnuts and/or raisins
½ tsp vanilla
Pastry or tart shells (1 box of refrigerated pie crusts is enough but will require rerolling)

Mix corn syrup and brown sugar in a saucepan. Cook gently for 5 minutes. Cool slightly. Pour mixture over slightly beaten eggs; beat continuously, adding remaining ingredients (except pastry, duh).

Press circles of pastry into 12 tart tins or muffin cups. Fill unbaked shells 2/3 full. Bake at 450°F for 10 minutes. Then reduce heat to 350°F and continue baking for an additional 15 minutes, until set. Don't overcook—it's better to pull them out a little on the underdone side so the tarts stay runny.


The Other woke me up on Saturday morning with the aroma of butter tarts coming out of the oven—not the healthiest breakfast by any means, but a tasty one!

Tuesday, December 09, 2008

Can I interest you in some shrooms?

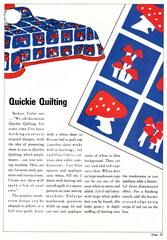
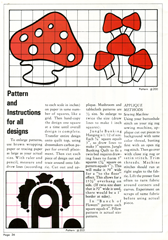
OK, when it comes to eating mushrooms, no fungus for me, thanks. They just feel a little too rubbery. But as a design motif, I'm all for our little fungal friends. So I'm pleased to offer this vintage mushroom appliqué pattern (PDF) for your downloading and stitching delight. It come from The New Barbara Taylor Book of Quilting, which I believe to be in the public domain.* (I didn't include all the generic text that's below—just use your favourite appliqué technique!)

mushroom pattern page 1 mushroom pattern page 2

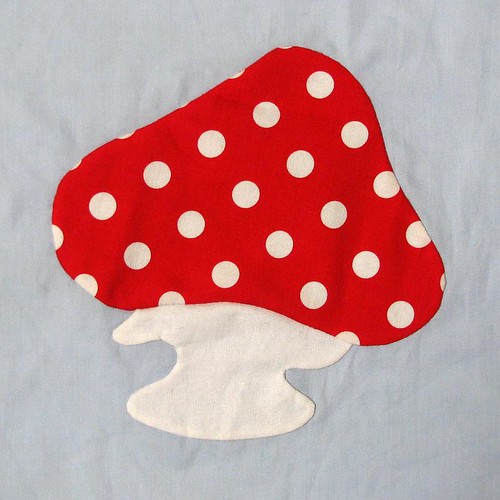
The pattern includes two blocks, one with a large mushroom and one with a cluster of smaller shrooms. I whipped up the big one with some scraps I had lying around, taking the pattern's advice of using dot fabric for the cap.

stitched shroom sample

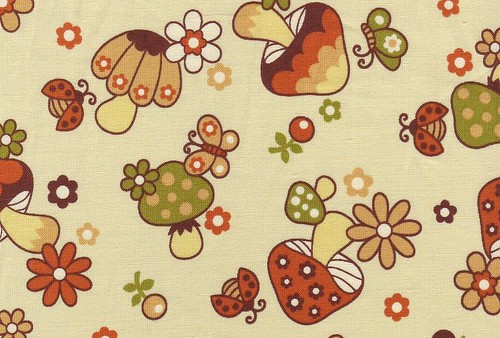
I thought the light blue background updated the colour scheme a bit (the booklet wasn't exactly full colour, to be fair). But then I bought a chunk of this Japanese fabric 'cause it seemed perfect to use with the pattern:

mushrooms and bugs dance jollily

So that sent me to the stash to find some coordinating prints. All well and good—I had some stuff that'll work well. But then I stopped by an estate sale and picked up a bag of scraps. Lo and behold...

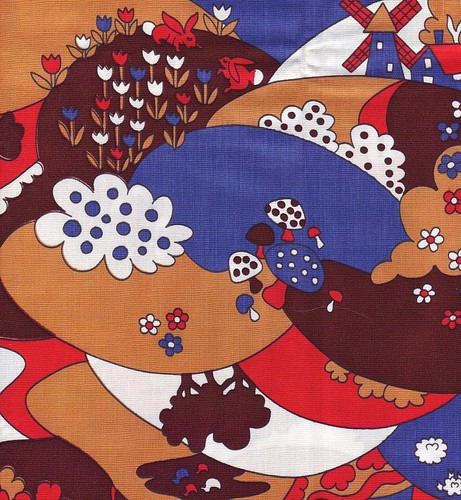
mushrooms and so much more on a crazy-mad hillside

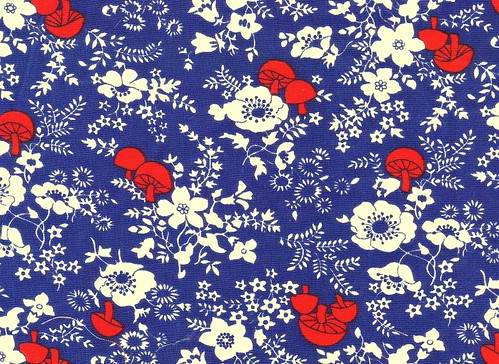
mushrooms on a bed of flora

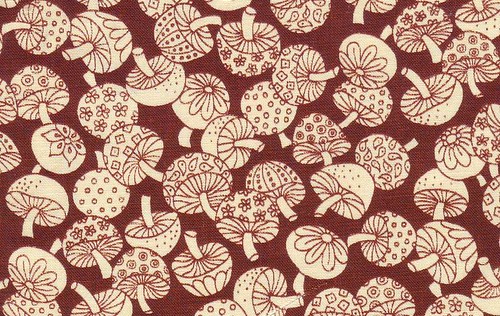
Mushrooms! In the original colour scheme of the appliqué pattern! The one with the windmills and rabbits and sheep along with the mushrooms was the one that sold me on this particular bundle of scraps; the other print was a treasure hidden inside. There was also a small chunk of this brown one, which could work with the Japanese fabric:

a miscellany of mushrooms in brown

So I'm not sure where to focus my fungal efforts. Because, of course, I have no other appliqué projects on my plate, no other quilting to speak of, and certainly no gifts to make as the clock swiftly ticks down to Chrimbo.

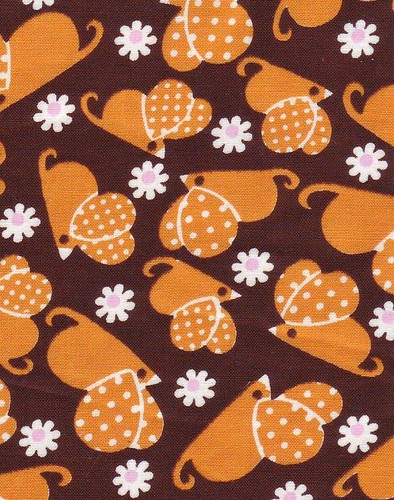
Here's another scrap that was in the bag—if only there were more of it! It's just a chunk of about 3" x 8".

mice or other rodents

If they're supposed to be mice, those are awfully big ears. Whatever they are, I like 'em.


* There is no copyright notice, and the ads indicate it was printed during the 1923–1989 period for which that means public domain according to this chart (and yes, I checked for registration).

Friday, November 21, 2008

Felt photoshoot

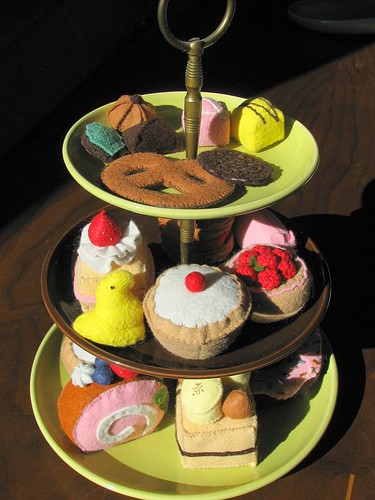
I've been stitching up a storm of felt sweets while watching TV, and we've been finding lots of fun vintage dishes in thrift stores. It was time to get them in front of the camera, so I staged a little photoshoot. So here are the dishes and felt food together, showing you the latest looks coming down the runway from the House of Feed Dog. With snacks from both sides of the Atlantic, this collection also draws on Japanese patterns, making it a truly international felt statement. Head to the linked books and websites for some patterns to whet your appetite for the original patterns that are on their way!

3049065270

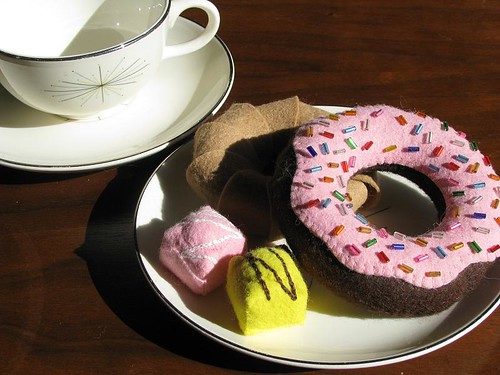
Our first look is a pair of doughnuts flanked by two saucy little French fancies. Oh la la! These desserts sparkle on Modern Star dishes by Taylor, Smith & Taylor. The sprinkle doughnut is from this pattern and the cruller comes from My Favorite Felt Sweets. The fancies are an original pattern.


3049065196

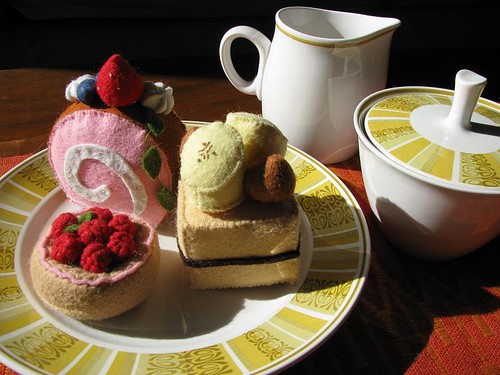
Showing off the lovely Franciscan Antigua is a tasty spread of cakes and pastries. The strawberry pinwheel and caramel-banana square are straight from the pages of My Favorite Felt Sweets, while the raspberry tart pattern comes to us in its native language, all the way from the Land of the Rising Sun, in Felted Sweet Treats . Thank goodness for help interpreting!


3048224575

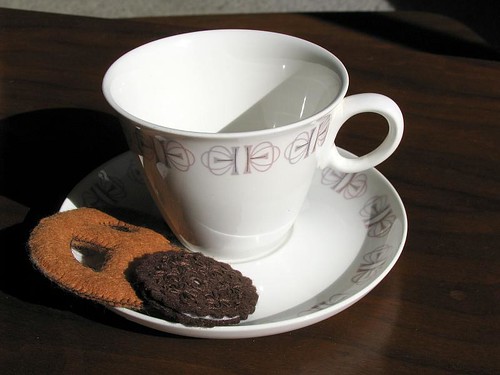
But there's more Franciscan in this line—just take a look at this Merry-Go-Round teacup, dressed to the nines with a pretzel biscuit (again from My Favorite Felt Sweets) and an off-brand Oreo cookie, a Feed Dog original.


3048224515

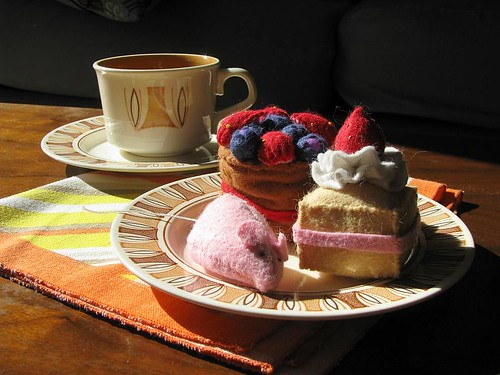
Ravishing on Taylorstone Etruscan, our next plate of puddings offers an eclectic range of treats, whether you fancy a luscious mixed berry pie or scrumptious strawberry shortcake (apparently taking a 16th-century ruff as its inspiration). Both are from My Favorite Felt Sweets. But what's a mouse doing amidst these sweets? It's a sugar mouse, of course! Adapted from Runo's pincushion pattern.


3049065338

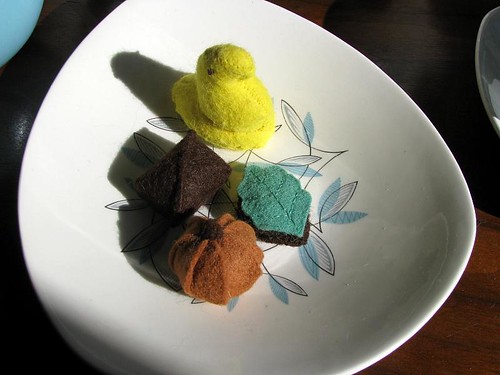
A daintier selection of chocolates (My Favorite Felt Sweets) look just as tempting on the classic Midwinter Cassandra, though the marshmallow Peep seems an unseasonable misstep in this fall collection. The design is appealing, but the gaudy color seems at odds with the more subtle tones of the chocolate mint, berry cream chocolate, and mocha meringue drop.


3049065372

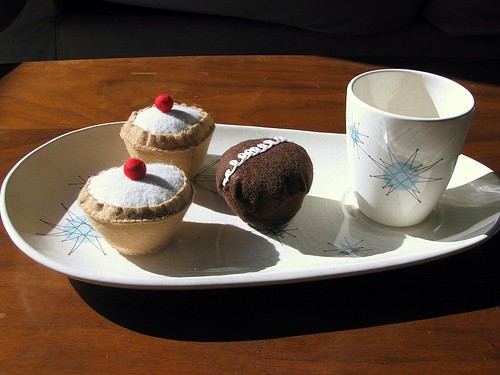
While Franciscan Starburst is an old favourite, this piece is a relative newcomer to the collection and makes a charming backdrop for a sneak peek at two dessert prototypes cut from the same original pattern: that English teatime delight, the Bakewell tart, and a cream-filled chocolate cupcake, found in the lunchboxes of so many American schoolchildren. Look for the two-for-one pattern soon as an Anglo-American Snack Pack!


3048224683

Let's bring out the models one last time for a final walk, all together. Divine! Delectable! Fierce! Fabulous! These girls know how to work it.
Thursday, November 06, 2008

Fly by Night quilt

3008609037

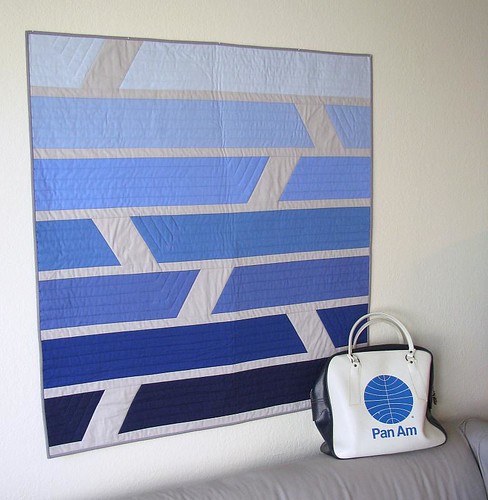
This is one of my earlier quilt designs, but I only just got round to making it. The idea came to me a couple years ago when I was flying somewhere at night. I'd been doing a lot of appliqué recently and was itching for an easy piecing project, so I finally got it cut, pieced, and quilted. I didn't even have to buy any fabric, since I'd had the stuff sitting around for ages!

It was a little odd to be working with just solids again, though I quite like the simplicity of it. And despite the pain of pivoting in the middle of the quilt, quilting it was fun. I love the texture of the straight quilting lines an inch apart, but I'm itching to build up my free-motion skills so I can do more. My sewing machine continues to be my BFF—the true miracle of dual feed is that you can use specialized feet when you're quilting, not just whatever foot is built into the walking foot. Pfaff's narrow-edge foot is fantastic for stitching in the ditch perfectly, and it's easy put on quarter-inch (finished size) binding when you can use a quarter-inch foot and the dual feed.

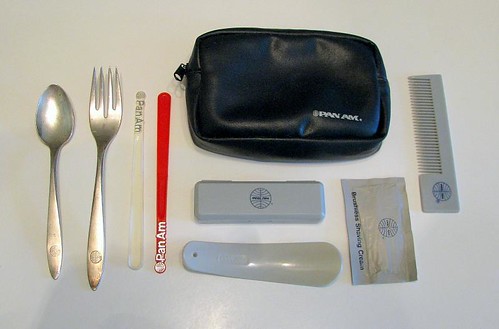
The quilt just happens to look smashing with the Pan Am bag the Other got me for my birthday last month. He also bought me a toiletry kit (to carry sewing bits) and some more airline cutlery:

3008609147

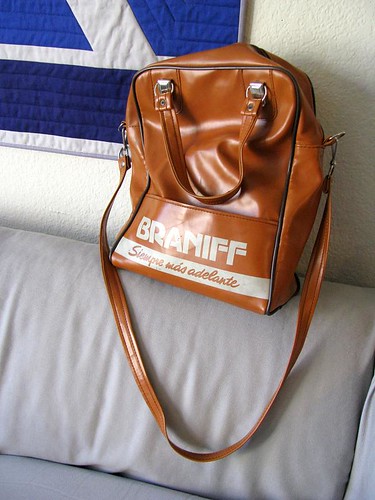
We've found quite a bit more cutlery recently, but I haven't got decent shots of them yet. The Other found me a nice set of Braniff dishes and a few bits of silver, which I'll also have to get a picture of. And speaking of Braniff, he gave me another lovely airline bag for my birthday too:

3009445448

I used it when the Mother and I hit PIQF and it made one of the vendor's day—I guess he had worked for Braniff back when, well, back when they existed. And the birthday joy just kept flowing as I filled the bag with fabric from the show care of the Mother's credit card. (She had to buy new luggage to get her own loot home, and it was quite a bit bigger than either of these bags.) Oh, and I think I made the Other buy me that narrow-edge foot as an early birthday present—I really am a spoiled brat. But thanks for a great birthday month, Other and Mother!

Now with all this airline paraphernalia, the Other and I may have to have a cheesy flight-themed dinner party—preferably wearing Space Bubbles.

Sunday, November 02, 2008

Please vote no on Proposal 8

I hope you'll forgive the brief political intrusion, but it's easy to think that political issues are abstract things that don't affect anyone personally. This isn't the case.

California's Proposal 8 would mean that the Other and I would not be able to share our lives the way any straight couple can choose to. Proposal 8 isn't about protecting marriage; it's about restricting it to only a certain type of people. If you really want to protect marriage, get a proposal on the ballot to eliminate the right to divorce—my ability to marry my partner doesn't invalidate or threaten anyone else's marriage.

God doesn't want discrimination. Yes, I know all about what the Bible says, and it's just as adamant that we don't eat pork or wear mixed fibers (though I run as far from poly-cotton blends as the next guy). Please don't be fooled into voting yes on 8 by the idea that it assures religious freedom. True religious freedom means that religious beliefs are personal beliefs, not law.

If you live in California, please vote no on Proposal 8. It may only be an abstract issue in your life, but it could mean very concrete and very real discrimination for me.

NO8-468x60-unfair

Tutorial: Freezer-paper circle appliqué for quilt labels

I had to quickly put a label on a quilt this week before sending it out into the world (more details on that later!). It seemed like a good opportunity to snap some pics for a tutorial on an appliqué method that uses freezer paper and starch and is a favourite of my quilt guild. It's a great technique for quilt labels, since the freezer paper stabilizes the fabric for writing on, and a circle cutter makes it even easier.

I wanted a round label so it would blend in with the bubbly fabric on the backing. That's where the circle cutter comes in.

freezer paper appliqué

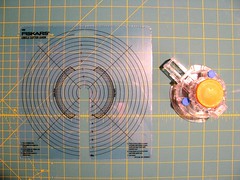
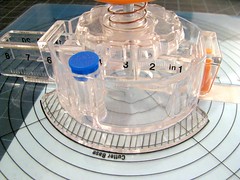
This circle cutter made by Fiskars was stocked with the papercraft supplies (I have used it to cut circles from fabric fused to fusible web—it dulled the blades and required a more careful movement but worked pretty well). There's a needle tip and a pad tip; use the needle tip. The guide is sold separately but helps find exactly where you're going to cut. The cutter blade tears up the mat a bit, so I use the cutting mat I use with X-Acto knives rather than the one I use to rotary cut fabric.

Materials

  • Fabric
  • Freezer paper
  • Iron
  • Circle cutter, guide, and cutting mat (or scissors)
  • Pinking shears
  • Spray starch
  • Paintbrush
  • Stiletto or chopstick
  • Ruler
  • Pen or marker
  • Light box or other bright light source
  • Fabric marking pen
Instructions
Click on any of the photos to zoom in.

  1. Iron 2 pieces of freezer paper together, shiny sides down. The doubled thickness is easier to wrap the fabric around.
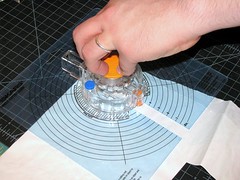
  2. Place the guide onto the freezer paper. I wanted a 3-inch circle. If you're making a shape other than a circle, draw it on the freezer paper, cut it out with scissors, and skip down to Step 6.
    freezer paper appliqué
  3. Place the cutter on the guide, lining up the cutter's feet with the marked spots on the guide. Make sure the cutting blade is above the guide's open notch.
    freezer paper appliqué
  4. Press down on the orange center of the cutter. While pressing, slide the guide out.
    freezer paper appliqué
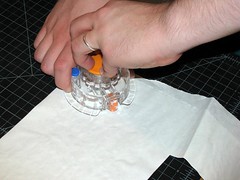
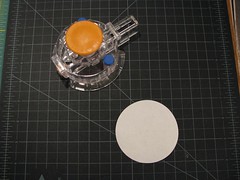
  5. Keep pressing and turn the body of the cutter around in a circle. You shouldn't have to apply much pressure. So, now you've got a perfect circle!
    freezer paper appliqué freezer paper appliqué
  6. Back to the ironing board. Press the freezer paper to the fabric, shiny side down against the back side of the fabric. (Your fabric doesn't have to be the same shape as the freezer paper at this point; I just happened to have a circle scrap.)
    freezer paper appliqué
  7. Cut around the freezer paper with pinking shears, just shy of ¼" from the edge of the paper. Or you can use scissors and clip into the seam allowance periodically, but the pinking shears cut out (geddit?) the clipping step and reduce fraying.
    freezer paper appliqué
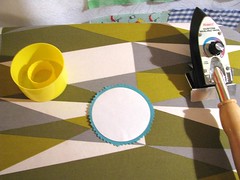
  8. Spray some starch into the cap of the can or another small container. Once the bubbles settle and the starch is a liquid, paint some onto the seam allowance. You can wet a few inches of the seam allowance at a time.
    freezer paper appliqué
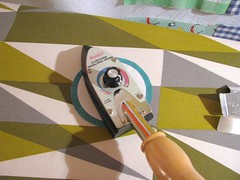
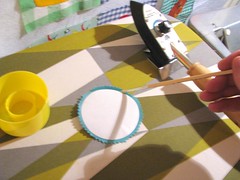
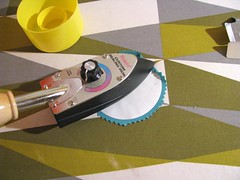
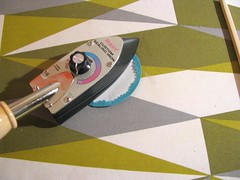
  9. Press the wet seam allowance over the edge of the freezer paper. A sealing iron like this one is easier to handle than a full-size iron, but anything works. Use a stiletto to pull the seam allowance down onto the paper—I wasn't about to spend $15+ on a sharp stick, so I just use a chopstick. You can't see the chopstick in the photo because I needed to hold the camera and don't have three hands (or a prehensile tail, which would really be preferable); it's generally easier to hold the stiletto/chopstick in your dominant hand. When you get near the end of the allowance you've wet, paint some more. If you get a fold or a point ironed in, just wet it and repress.
    freezer paper appliqué
  10. When you've pressed all the seam allowances down, give the whole piece a quick press.
    freezer paper appliqué
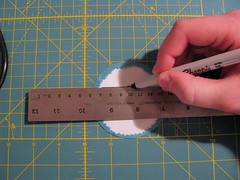
  11. Normally you'd remove the freezer paper now, but since we're making a quilt label, we're not done with it. To help keep your lines of label text straight, draw heavy lines on the freezer paper. I lined my ruler up with the half-inch marks on the cutting mat to keep them parallel and evenly spaced.
    freezer paper appliqué
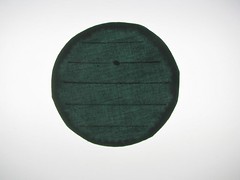
  12. Chuck the thing on a light box. Or a bright window, or a glass table or clear box with a lamp under it. See how the lines peek through? So does the lovely blob my pen made while waiting for me to focus the camera. (I'm also noticing that my pressing job could have been better—I should have repressed those points on the edge. Instead I rounded them out when I was sewing.)
    freezer paper appliqué
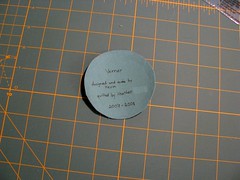
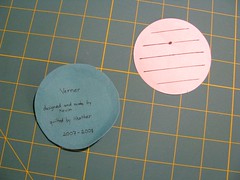
  13. Write your text with a fabric-marking pen, using the lines as guides. I can never get everything centered, but at least the lines are straight. Pop the label off the light box.
    freezer paper appliqué
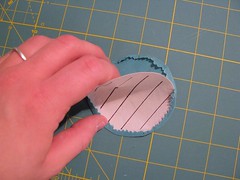
  14. Now you can peel the freezer paper out. The fabric will keep the circle shape.
    freezer paper appliqué
    How do you like them super-pink fingers? I'm having a little trouble getting my screen colour calibrated.
  15. And sew the sucker down! I sewed this one down by hand with a blind stitch, but sewing a label to a finished quilt, you can sew by machine with monofilament thread and a blind-hem stitch. Either way, I highly recommend basting glue over pins.
freezer paper appliqué

And that's it. You don't have to make the circles into labels, of course, but on the other hand, quilt labels don't have to be rectangles!

Friday, October 31, 2008

Happy Halloween

2990406664

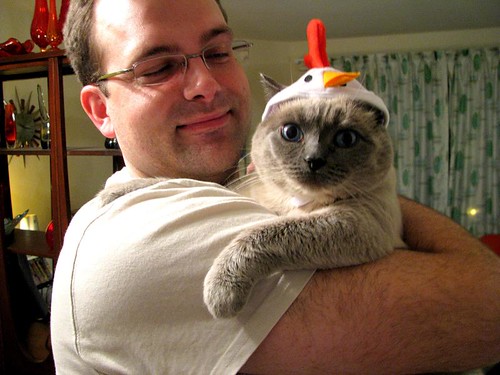
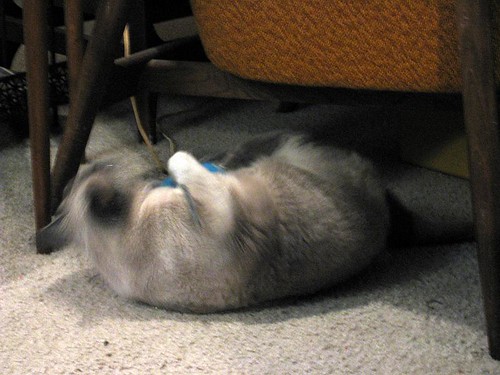
Embarrassing Felis Domesticus is about as festive as it gets over here.

Ugh, two cat posts in a row. I have a tutorial in the works—promise.

Thursday, October 23, 2008

Felis Domesticus and paramecium

Oh dear, I've been woefully neglectful of my online persona yet again. This time I shall blame the Mother, who invaded for a week and dragged me (kicking and screaming, of course) to PIQF and every quilt shop in the land. And to top it all off, she insisted on paying for all of my fabric—can you believe the nerve?

Felis Domesticus was on her best behaviour with the Mother, ignoring but eyeing her suspiciously her for days.

cat and paramecium

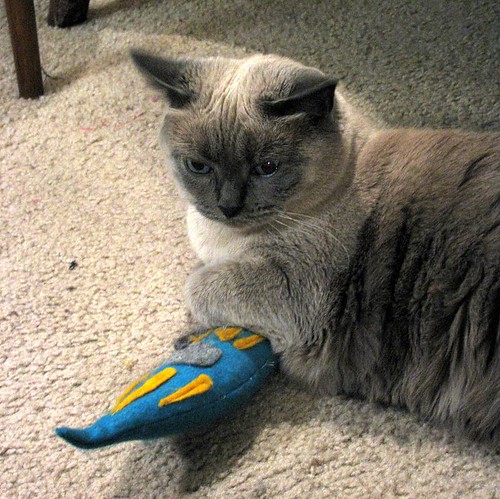
Here's the beast protectively clutching her paramecium toy. I found the felt microbe in a bag when cleaning and finished it up for her—it was a very early, abandoned sewing project—and she quite enjoys the wool flagellum and catnip-stuffed cytoplasm.

cat and paramecium, locked in combat

And here she is disemboweling the poor paramecium. The Mother eventually earned Felis Domesticus's affection by dangling the flagellum in front of her, and when they were finished playing Felis expressed her appreciation by licking the Mother's hair. Cats are gross.

Alas, Felis has been lulled into a very tentative sense of security, as the parents will soon be moving overseas and leaving their dog with us. Felis Domesticus ain't gonna be the only beast on the block for long....


Sunday, September 28, 2008

Ten years of the Simplicity Sewing Book

1962—no notions to be seen.


1970—the notions creep into view.


1972—ohmigod, she's got notion fingers!

On Amazon: even more editions

Tuesday, September 16, 2008

Tutorial: (Almost) All-Purpose Appliqué Board

A few weeks back, I spent the weekend stitching with some women from my quilt guild. This was the perfect excuse to finally get some needleturn projects going that had been languishing in set-up phase. While I was gathering all my bits and bobs to shove into my quilting-to-go bag, I came up with my new favourite quilting tool. Keep your bobbin winders and your Thangles; I'm all about the clipboard.

appliqué clipboard

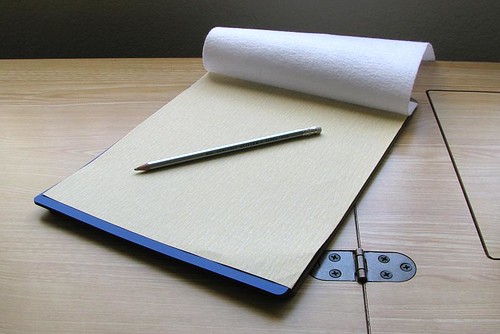
Yes, a boring old clipboard is the current apple of my eye. Mainly I needed a sandboard, something the Mother has for keeping fabric from stretching while tracing appliqué shapes. She also makes crude versions by spray-mounting a sheet of sandpaper insider a file folder. And while this is a clever trick, I wanted something a little sturdier. I clipped a sheet of sandpaper to a clipboard, and behold! There it was. But my thoughts kept drifting to other 9" x 12" accoutrements to trick out the board with. So I now present my (Almost) All-Purpose Appliqué Board. This may seem like a long-winded tutorial for a tool that's really pretty simple, but the sequence of the stack is important to access everything properly.

  1. You'll first need a letter-sized clipboard. Mine cost all of 39¢ at a thrift shop.
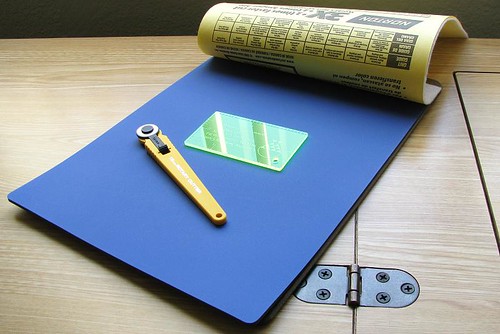
  2. appliqué board cutting layerA self-healing cutting mat is the first layer of the board, useful for cutting out appliqué pieces with an 18mm rotary cutter and, for straight lines, a credit-card-size ruler (a much appreciated freebie from a local quilt shop). I happened to have a 9" x 12" mat on hand, but they can be tricky to find. Here's a Fiskars one punched (but too tall) to fit in a three-ring binder, an X-Acto 8.5" x 12" mat, or an 8.75" x 11.75" one from Omnigrid. You might be able to use a cut-out section from an older mat instead. My ungridded mat came from a start-quilting combo pack (can't find anything to link to, sorry) that I bought so the Other could have his own rotary cutter (it was a pretty crap gift, since I kept the cutting mat and the ruler for my own evil purposes and am now eying up the cutter for permanent pinking blade installation). When clipped, the cutting mat will probably be a little longer than the clipboard, but it's stiff enough that it shouldn't matter.
  3. appliqué board tracing layerOn the cutting mat goes a sheet of sandpaper. Standard sheets are about 9" x 11", so they'll fit right over the cutting mat. Put your fabric down against the sandpaper when tracing around a template, and it won't slip and stretch as much.
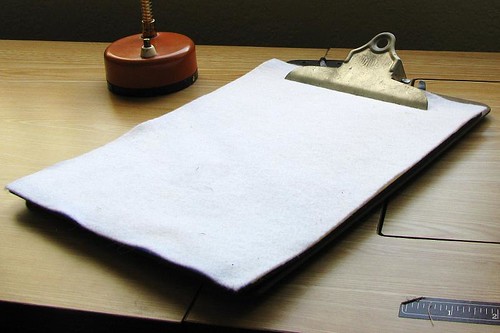
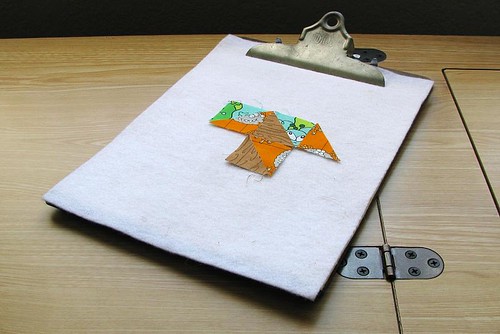
  4. appliqué board design layerPut a sheet of white felt on top of the sandpaper. No need for fancy wool—one of the precut sheets of acrylic craft felt will work perfectly. This can be used as a mini design wall for laying out whatever block you're working on. I use it when I'm gluing the pieces down onto the foundation.
  5. I'm also planning to try adding an overhead transparency with a block design printed onto it to help position the pieces on the foundation. The felt will help keep the foundation in place while using the overlay.
  6. Clip everything into the clipboard. You just have to lift back the layers to get to the one you need. If there's any info you refer to frequently, you could stick it on the back of the clipboard. Templates can be tucked between the layers so they don't get scrunched in your workbag, and you can even leave fabric bits stuck to the felt layer during transport if you're not too rough on the board.

Simple, right? I've been using it quite a bit at home for working on appliqué in front of the TV.

So why is it only almost all-purpose? Well, there's no ironing surface. You can't press on it. I'm sure some industrious someone could come up with a way, but for something cobbled together from what I had lying about the sewing room, I'm pretty satisfied.

Friday, September 12, 2008

Silverware in the sky—what decade is this?

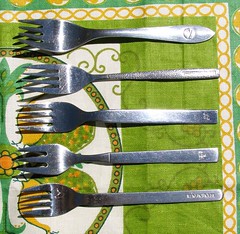
forks

Metal cutlery seemed like such a small thing in the olden days of flying. Who even thought much about it until it went the way of water past the security checkpoint? Now you just feel grateful if you're served anything in the air that requires the use of a knife, chintzy plastic or otherwise. We'll be telling out kids "I remember when they served food on aeroplanes—with actual metal cutlery!" instead of "I remember the days before remote controls!"

In our thrifting sojourns, the Other and I have taken to scrounging out airline silverware. We have so many dishes we don't know what to do with them all, but our cutlery has been bog-standard Ikea or some ming thing with twisted-loop ends that the Other bought before I moved in and demanded veto power. Since we can't afford the Arne Jacobsen cutlery I once loving caressed (in stainless and silver!) at St Catz, these airline relics seem like a fun way to go. We came across a few bits randomly and have built quite a collection over the past months. I guess people nicked the stuff as trophies for a collection, 'cause when we find one logo sticking up from a silverware bin, some digging usually reveals several more.

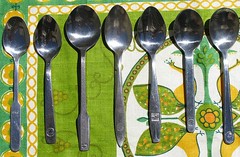
airline spoons
L to R (click images to enlarge): SAS, Air Canada, Eastern Airlines, Pan Am, Western Airlines, Lufthansa, Korean Air.

We really splashed out for a few choice pieces that were $2 each—not bad consider most were got for 25¢ or less. The one piece that's actually silver, the Pan Am spoon, was one of these big-ticket items. It was completely tarnished when we found it, but I managed to make out the logo, and the Other cleaned 'er up nicely with a little toothpaste! Pan Am was definitely on our wishlist, since there just seems to be something glamorous about America's only real international airline. Really, all the defunct airlines are extra fun; the Eastern spoons came from the most recent dig, but Western I'd never even heard of till I identified the logo.

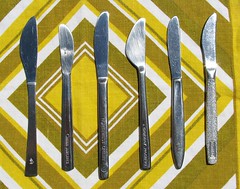
airline knives
L to R: Singapore Airlines, China Airlines, Northwest Orient, Cathay Pacific, UTA, United.

Air Canada is another favourite as a nod to my Canadian heritage (so glad I didn't pay $15 a pop for the ones we saw in San Francisco!), and we were also happy to find the Lufthansa forks and spoons for the Other, who has spent much time in Germany. The flag carriers/national airlines seem more distinctive somehow, though it's also been fun to track down airlines I didn't recognize, especially when presented with only a logo. My family will vouch that I've always had a logo fetish (which sits oddly with my refusal to wear branded clothing). Now I know we had a KLM fork or something. Where the fridge has it gone??

airline forks
Top to bottom: Lufthansa, Mexicana, Iberia, American Airlines, EVA Air.

Aside from the logos, some of the cutlery is quite elegantly designed. The Cathay Pacific knife has to be one of my favourites. The very geometrical Lufthansa teaspoons are nice too, and so is the curvier Lufthansa fork from a different period. It's also interesting to look at the manufacturer's stamps to see pieces were made in the country of the airline's registry and which were made in Asia or Japan despite being registered elsewhere. And sometimes cutlery that looks essentially the same (we have multiples of some of the pieces) were made by different manufacturers in different places.

I'm not offended if you've just looked at the pictures, but if you're not bored yet, I compiled some figures for my own curiosity:
  • Total countries: 11
  • Total continents: 3
  • North American airlines: 8
  • Asian airlines: 5
  • European airlines: 4
  • Defunct or absorbed airlines: 4

Our eagle eyes are out the lookout for more (hopefully the summer dry spell will end at our local thrift stores!), especially these choice numbers:
  • British Airways—even better, something with the BOAC Speedbird! And while we're at it, throw in British Rail—who says we have to stop at air travel?
  • Braniff, especially from the Alexander Girard years
  • Continental from the Saul Bass years
  • TWA, the other long-gone American international airline
  • Qantas, especially if it shows the kangaroo!
  • Aeroflot, especially if it shows the hammer and sickle!
  • something from Africa, South America, and Australia to round out the continents
I'd totally be pinching them the next time I flew, but a plastic spork just doesn't have the same appeal.