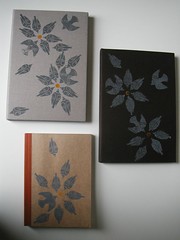
As I've been cleaning out my apartment, I've been trading books in at a local bookshop. In exchange, I got a stack of quilting books from the 1970s, and I've been thumbing through them incessantly ever since. I thought you might like a look too.
Books like these show the quilts being made before the multimillion-dollar quilting industry really took hold. They perfectly suit my taste for quilts that are neither traditional nor art quilts—and, well, it's pretty clear that my aesthetic is heavily retro.
It's amazing to see the quilts that came together without the
thousands and thousands of bolts of fabric made specifically for quilting that we have access to today. Virginia Avery wrote in 1978 in her
Big Book of Applique
:
What a feast of fabrics we have today! Never before has there been such plenty, and never before has the choice been so difficult.
Our options have only grown.
Click on the square pictures to see bigger versions. I've picked out some of the photos that especially intrigued me, but if you're thinking of tracking down copies for yourself, keep in mind that there are usually only a handful of color plates scattered throughout each book; most of the photos are black and white.
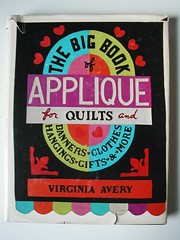
The Big Book of Applique (1978) was a real score. The author can be a bit corny/whimsical ("Lure of the Islands, Magic of the Tropic Sun" is the name of the Hawaiian appliqué chapter), but the book has tonnes of pictures of the kind of free-form appliqué that was happening in the '70s. It covers a broad range of techniques, but the real treat is just browsing browsing for inspiration.

Riddle me this: if everybody in the 1970s quilt revival was making these wild appliqué quilts, what happened to them? OK, so maybe it wasn't everyone, but there seems to be a certain genre of appliqué quilt that you just don't see at the flea market.

I'd once toyed with the idea of doing something similar myself, but seeing it done here, I don't think I'd have the patience.
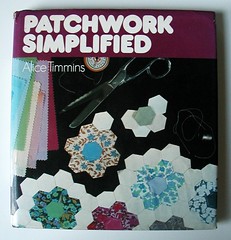
I nearly didn't bother with
Patchwork Simplified
(1973), but I'm glad I did. Though I have an American edition, it's an English book, so it takes an English piecing approach (that is, paper templates are wrapped with fabric, as in a traditional Grandmother's Flower Garden quilt). Even with my Anglo-Canadian-American background, my quilting practice is American, so I've been fascinated to learn other ways of working—especially since the American quilting tradition is so strong and often independent of developments elsewhere. English piecing apparently isn't just for hexagons; all the square work in the book is done the same way. In fact, the book lists the machine-piecing so familiar to us Yanks as an "experimental" technique!

The author's real talent lies in her colour and fabric choices, particularly in composing these small pillows of tiny squares. It seems quilters had access to crazier fabrics in Europe than in America, where gingham, stripes, small florals, and the like were still the dominant prints used.

Another striking composition, and a creative way to use dot fabric. I love the asymmetry. But why on earth wouldn't you just machine-piece it??

This, on the other hand, demonstrates the versatility of English piecing. It would certainly be a trick to do this with standard machine-piecing.
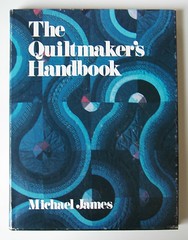
The Quiltmaker's Handbook
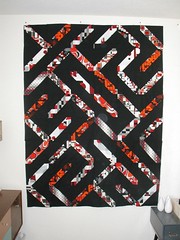
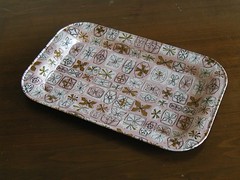
(1978) aesthetically focuses on highly geometric piecing but offers a solid quiltmaking lesson. The love the cover quilt.

This is typical of the author's quilting style: a geometrical approach that isn't wholly removed from traditional quilt design but is fresh in colour and layout. The notches in the sides and at the corners (
Battlestar Galactica cut corners, anyone?) are also typical of the not-quite-square quilts he shows in the book.

Another interesting shape in a nice colour palette.

I liked the dynamism of this deceptively simple quilt as well as the way it ignores traditional block structure. The allover quilting design looks ahead of its time.
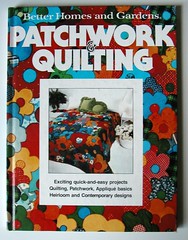
Mark Lipinski recommended
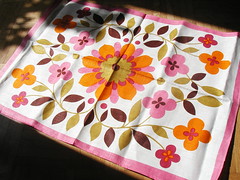
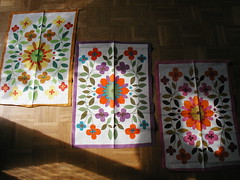
Better Homes and Gardens Patchwork and Quilting (1977) in an issue of
Quilter's Home, and I happened to find a copy recently. This is more of a pattern book than the others, and many of the patterns are fairly traditional, despite the cover. But there's still some modern stuff.

The colours and irregular stripes of this one reminded me of the Any Way You Slice It quilt in
Denyse Schmidt's book.

Another example of the strong, colourful, graphic appliqué of the '70s. It's so rare now to see such a detailed quilt made entirely of solids.

This quilt is the cover model, a modern take on Grandmother's Flower Garden. I like the pattern's somewhat vague layout instructions; patterns today sometimes give too-precise directions to fake a haphazard appearance that's better done by eye.
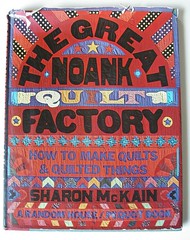
Also a bit more of a pattern book,
The Great Noank Quilt Factory (1974) gives lessons of increasing difficulty to teach a beginner various techniques. The author has some peculiar ideas—for example, she suggests using the "smaller" toe of the presser foot, which is apparently always one-eighth of an inch, to set your seam allowance, contradicting the near-universal rule of quarter-inch seam allowances. But some of the projects are worth a look.

I liked this simple quilt for its mix of print and pattern, piecing and appliqué.

These chevrons make quite a bold statement. The impressive colour gradation is in the quilt, not just a flaw of my admittedly crap camera.

Another geometric wonder.

And a word of warning: please do not subject your children to these terrifying
masks face sacks. Yikes.
The best vintage quilting book I've found, though, is
Quilts and Coverlets
by Jean Ray Laury. I didn't include it here because it wasn't part of my recent binge, but also because there's a good sampling of images from it out there somewhere. I discovered the book through another blogger who had posted a bunch of pictures from the book, but I can't find the post now. Does anybody know it? Some pics are
here and
here, but neither of those is the post I'm thinking of. If we can't track it down (and there's interest), I'll post some of my favourite shots here.