Pages

Wednesday, August 31, 2011

AccuQuilt giveaway update: Finalist round

All your votes in the block design contest are testing the limits of the polling system! In fact, we’ve hit the limit of the number of votes it’ll allow. But it’s only Wednesday, and voting is supposed to stay open until Sunday—so here’s the (revised) plan.
The 3 blocks that had the most votes when the original poll hit its limit will go into a finalist round. That means everybody can for their favorite of those 3, whether you’ve voted in the first round or not. Hopefully that will allow everybody to still get a vote in before September 4, when the voting was originally supposed to end.
The new poll is in the sidebar on the right (if you’re in a feed reader, click on over to see it). Votes will stay open until September 4 at 11:59pm PT, and this time the poll will accept as many votes as you feed it! The final winner of the AccuQuilt cutter and dies will be whoever is the favorite finalist. Update: Votes are in; see the new post for the winner!

Sorry to be changing things up in the middle; after much thought this seemed like the best way to solve the problem.
The finalists are…

Barbara D.

BarbaraD
Dies used:

Belinda K.

BelindaK
Dies used (12" × 12" block):

Sara P.

SaraP
Dies used:

Monday, August 29, 2011

Giveaway: Vote for your favorite block to choose a winner!

Update: The high volume of votes have created technical difficulties...the original poll is now closed, and the 3 leading blocks enter the finalist round. Vote for your favorite finalist in the blog sidebar, even if you voted in the first round!

The entries are in for the AccuQuilt block design contest—who wins the Go Baby cutter and dies depends on whose block is your favorite. Take a look at all the entries, then vote at the bottom of the post (votes are limited to one per person/IP address, so choose carefully!). Voting ends Sunday, September 4 at 11:59pm PT.

I’m thrilled that these blocks use AccuQuilt dies in clever ways I never would have thought of. The dies each designer used are listed so we can all benefit from their creativity. In general I’ve listed extra info the designers sent regarding block size, specific die shapes used, etc.—a couple designers also sent pictures of quilt layouts using their blocks, but in fairness to everybody I’m just posting the blocks themselves. But keep potential block settings in mind when picking your favorite!

Thanks and good luck to everyone who entered, and thanks for voting!

Anne V.

AnneV

Dies used (10" × 10" block):

Barbara D.

BarbaraD
Dies used:

Belinda K.

BelindaK
Dies used (12" × 12" block):

Darlene M.

DarleneM (767x800)
Dies used (starting from a basket block in the EQ7 Block Library):

Michelle F.

MichelleF (800x800)
Dies used:

Michelle S.

MichelleS
Dies used:
 

Sara P.

SaraP
Dies used:

VOTE!

Cast your vote for the winner below (if your browser doesn’t allow scripts, click the link to view the poll and cast your vote). Vote for a finalist in the sidebar!

Friday, August 26, 2011

Giveaway deadline tonight!

Just a reminder…if you haven’t entered the block design contest to win an AccuQuilt Go Baby and dies, you have until 12:00am PT to get your entry in! Check the original post for how to enter and my tute for tips on working with die shapes in EQ7.

Whether you enter or not, check back on Monday to see the blocks and vote for your favorite!

Monday, August 22, 2011

EQ7 Tutorial: Changing block size and merging shapes into a single EQ block

If you’ve started working in EQ7 on your block design competition entry, you may have noticed that the AccuQuilt blocks are drawn at the same overall size as the corresponding die—so if you want to use shapes from a 6" × 12" die, say, it looks like your block has to be that size: if you change the dimensions of your block canvas in EQ, the shapes change too, which means they’re no longer cuttable using the the dies. It gets even trickier when you want to work with shapes from multiple dies to make a block, especially when the shapes come from dies that are different sizes. medallion2

But it can be done! This 12" block is proof of that. It uses shapes from the Go Daisy die (6" × 6") and the Go Feathers die (5" × 10"), and the shapes are all kept at their original, die-cuttable sizes.

Here’s how I was able to retain the original sizes and work with shapes from multiple dies in a single block. This is the easiest way I’ve found, but leave a comment if you have any other tricks!

  1. After adding the AccuQuilt die blocks you want to work with to your Sketchbook, open one of them on the Block Worktable (this one is the full Daisy block). Make sure your Precision Bar is showing (turn it on or off in the View menu). Select all the shapes shown in the Applique tab with the Pick tool (hit Ctrl+A to select them all automatically), and note the dimensions shown in the Precision Bar:
    image
  2. Deselect the shapes by clicking elsewhere on the worktable. The Precision Bar will now show the size of the block itself:
    image
    Since the Daisy die measures (nominally) 6" × 6", that’s the size this block was drawn at. Change the numbers in the Block Width and Block Height fields to the size you want your actual block to be—for this example, a 12" × 12" block. The shapes will stretch to match the new proportions:
    image
    As a result, the block looks exactly the same at this point—only the ruler and Precision Bar show that it’s been scaled up to 12". But we want to use shapes we can actually cut with the die, so they have to be changed back to the size they were in the 6" block.
  3. Select all the shapes again.
    image
    The dimensions now shown in the Precision Bar aren’t significant. Replace them with those you noted in Step 1, and you’ll get this:
    image
    The shapes are now back to the size at which they were originally drawn—that is, the size the die will actually cut. Save this block to the Sketchbook. If you want to design a block using shapes from just this one die, you can go ahead with your design at this point. But if you want to add shapes from other dies…
  4. View the Sketchbook and edit the block with the shape you want to add. I only needed the teardrop shape from the Feathers die, so that’s the block I used. Again note the dimensions of the shape(s):
    image
    Then copy the shape to the clipboard, using the toolbar button or Ctrl+C.
  5. View the Sketchbook again and edit the block you saved in Step 3. Then paste the shape from the clipboard (toolbar or Ctrl+V). It will be selected when you paste it, showing that its dimensions have changed to suit the proportions of the new block:
    image
    But again, this isn’t the shape’s size on the actual die.
  6. Change the shape dimensions to those you recorded in Step 4:
    image
    Now the shape is scaled appropriately, and you can move, rotate, flip, and otherwise rearrange the shapes with confidence that the die cutter will still work—as long as you don’t resize the shapes, of course.

By the way, this method will work for any EQ blocks, not just those based on AccuQuilt dies—pull shapes from the Block Library blocks into your own designs, or vice versa.

Thursday, August 18, 2011

Giveaway: AccuQuilt Block Design Contest

Update: See the entries and vote for your favorite!
AccuQuilt Go Baby die cutter
Want to win your own 
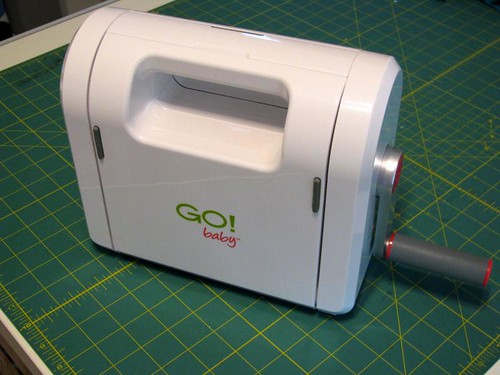
AccuQuilt Go Baby die cutter and your choice of 3 dies? Well, AccuQuilt and I want to send them to you! I’ve always found Lady Luck to be a bit of a b*tch, so to win this giveaway you have to get creative—I want to see what you’d do with your die cutter.
For a chance to win, design an original quilt block using AccuQuilt Go die shapes. But how, you might ask, are you supposed to design a block with die shapes if you don’t already have a die cutter? There are a couple ways. If you use EQ7, you can download block libraries featuring AccuQuilt shapes and drop them into a quilt design—I showed a couple blocks I made with EQ in this post. You can still enter if you don’t have EQ7, though: just download this PDF with a selection of die shapes (each page shows a different die), print it, cut the shapes out, and arrange them to design a block out of paper or fabric. These die shapes are best for appliqué, but you could design a pieced block using other 
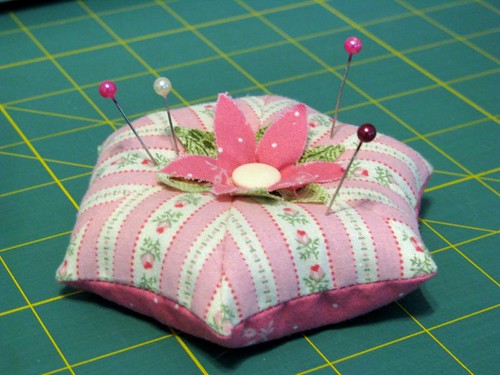
Go dies if you like. You don’t have to sew anything—just show us what you could do if you won the cutter and dies.
The block background can be any size you like, though it has to be possible to cut the shapes out with AccuQuilt dies, so make sure not to resize any of the shapes.
E-mail a JPG or PNG of your block design to giveaway[at]feeddog[dot]net by midnight (Pacific Time) on August 26, including in your e-mail a list of the dies used (check the Notecards in EQ7 or the footer at the bottom of the PDF pages). I’ll post all the entries here and readers will be able to vote for their favorite. After a week of voting, whichever block has received the most votes will win a free Go Baby cutter and dies for its designer.
22 Free Patterns - Download NowOne entry per person please. Tell your friends so we can build a great gallery of block ideas! Designs remain the property of their designers, but by entering you give permission to display your block on this blog and feeddog.net.
If you’re working in EQ7, it’s easiest to make a “block” on the Quilt Worktable, but stay tuned here for some tips on getting the die shapes into the Block Worktable.
Good luck!

Wednesday, August 03, 2011

Tutorial: Fussy-cutting stripes with AccuQuilt triangle dies

AccuQuilt pincushion

Triangles cut from striped fabric can be used for lots of cool piecing effects, like setting the stripes to make concentric shapes or to radiate from a central point, as in this version of my hexagon pincushion. With a little care, this is pretty easy to do using an AccuQuilt Go triangle die—I’m again using the trusty Equilateral Triangles die they sent me, but this method could be adapted to any die for half-square triangles, isosceles triangles, or what-hast-thou.

Definitely start by watching Ebony Love’s video series (part 1, part 2, and part 3) on marking AccuQuilt dies. She gives a very thorough explanation of how she marks her dies not only to make the blades easier to see but also to help with fabric placement. Per her recommendation, I used a silver Sharpie pen to mark up my die; other opaque, light-colored permanent markers could work too.