Pages

Showing posts with label EQ6. Show all posts

Wednesday, November 24, 2010

Free Pattern: Snowmen for appliqué or embroidery

OK, OK; I know tomorrow is Thanksgiving. But I’ve been itching for Christmas since the Halloween accoutrements hit stores, and for once I’ve had no problem with Chrimbo being rolled out ridiculously early by the gods on Mount Retail. (But please, keep the effing holiday music away from me. Yech. This will forever be a playlist-free blog.) I’m dying to get the tree and ornaments put up, and I’ve actually already started covering our living room ceiling with snowflakes. Last Christmas was a bit of a non-starter, so I’m ready to put my Grinchy ways aside and spread some cheer, dammit.

What does this mean for you? Well, I’m planning to share all my crafty Christmas stuff (“crap” would’ve alliterated better, but I shan’t give you crap!) with you here—photos, tutorials, patterns, and other bits of fun. So to start with, a free pattern for appliqué (or embroidery, if you like)!

Snowman tea towels

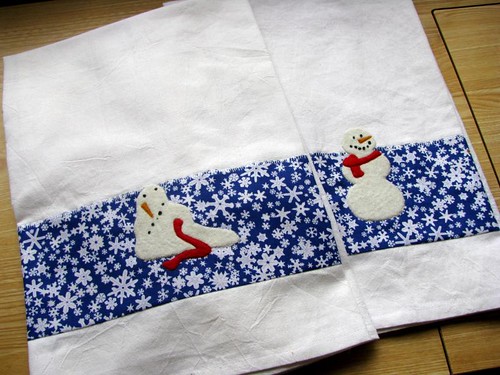
I made these tea towels for Middle Brother and his wife a couple years ago, fusing wool felt to the background to give the snowmen some dimension. A really narrow zigzag around the edge of the felt with matching or invisible thread rounds the edges rather splendidly.

Something was missing, though: how did snowman A, standing happily, become snowman B, melting into a sloppy pile of sludge? Snowman C, armed with a hairdryer, is the culprit:

Snowmen, Before
Snowmen, After

Why is Snowman C so ill-spirited? You’ll have to supply your own motivation; I’m just supplying the pattern.
If you’re not feeling the appliqué, try a melting redwork snowman instead:

Snowmen in Redwork

Two formats are available:
  • Get the PDF to print out and transfer for your favorite appliqué or embroidery technique.
  • Get the EQ7 project file to use the snowmen blocks (on the Motifs tab) in your own quilts or other EQ designs.
Designs are copyright © 2010 Feed Dog Designs, but you’re free to use them on Christmas gifts, decor, or whatever you like. Happy stitching, happy Thanksgiving, and look for more holiday goodies here soon!

Friday, April 30, 2010

My EQ7 wishlist

2boxesHave you heard the news? The Electric Quilt Company is releasing the newest version of their quilt design software, EQ7, in June! The current version, EQ6, is the core of my design process, so I’m looking forward to seeing what extra goodies are packed into the update.

EQ is one of those pieces of software that the more you use it, the more you want to do with it. I’ve been using AutoHotkey to build some extra features into EQ6, expanding on my EQ6 Keyboard Shortcuts script. I just never got around to polishing the edges, fixing bugs, and posting the updated version here. Since it’s possible EQ7 will render parts of my script redundant (I hope!), there’s not much point updating it now. (I’ll put the alpha version up soon anyway if you’re interested.)

I mention it mainly ’cause it’s the basis for my EQ feature wishlist…so here are some of the things I’m dreaming of EQ7 doing (I’m not sure if these really are new features; I’m just hoping!):

  • Keyboard shortcuts. My script lets me access almost all of EQ’s tools from the keyboard, just like in a professional-grade graphics program, but it takes some kludges to work it.
  • Binding and backing calculations. EQ knows how big your quilt is, so why won’t it tell you how much binding or backing fabric you need? I programmed a binding calculator into the script that automatically calculates the yardage needed and the number of strips to cut based on the dimensions of your quilt. Here’s hoping EQ7 will save me programming the backing calculator!
  • Flexible irregular grid quilts. I’m getting better at using Custom Set layouts, but I’d love to be able to adjust the size of a block and have the software recognize that the surrounding blocks should be adjusted accordingly (instead of leaving a hole in the quilt). The press release says EQ7 will snap Custom Set blocks to their sizes from the Block Worktable, which should be a big help.
  • Rotary cutting for the whole quilt. Say your quilt is a Custom Set design with all different size blocks. Even if each is only a plain, unpieced block, you have to look up the dimensions of every individual block to see the cutting sizes. I’d love to be able to print the Rotary Cutting Chart for the whole quilt top and not just one block at a time—it’d be even handier if it could tally up the number of, say, red 2" squares scattered across multiple blocks.
  • Automated Fabric Library. I keep scanned and downloaded fabric swatches in a particular folder, and it’d be cool if EQ would scan that folder and automatically add the swatches to the Fabric Library. Not sure if EQ7 will do that, but the press release says we’ll be able to crop and edit fabric scans right in the program—no more stopping to fire up the photo editor. EQ7 has a new emphasis on photos, including an Image Worktable, so there should be some fun new tools to try out.
  • Large-scale fabric compatibility. EQ6 limits you to 200-pixel fabric tiles, which means prints with big motifs—like many current designer fabrics—don’t work well at all. I’d love to have an option to import larger tiles and set the scale, maybe with an on-screen ruler. It’d be great for trying out fussy-cut possibilities before chopping up real yardage.
  • Windows Explorer thumbnail previews. Rather than seeing a folder full of EQ logo icons, wouldn’t it be great to see previews of the first quilt in the files’ Sketchbooks? It’d be just like when you open a folder of photos and see the actual pictures instead of generic icons.

So that’s my EQ7 wishlist. I can’t wait to see all the tricks the new version has up its sleeve!

Thursday, August 27, 2009

Amy Butler Softwares review

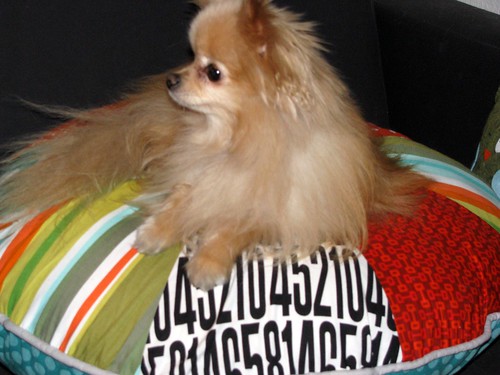
Amy Butler Softwares cover Head over to True Up to read my review of Electric Quilt’s Amy Butler Softwares pattern program! Kim gave me the chance to play around with the software, and one of the test projects I made was the Pinwheel Pillow—shown here as commandeered by Princess Fluffinstuff.

Her Highness on her dais

Tuesday, July 14, 2009

Round the web with EQ

I was thrilled when Kim Kight of the incomparable True Up asked me to review the latest edition of the Electric Quilt Company’s fabric-swatch software Stash—call it a perk of using an overheating HP instead of a shiny Mac! Playing with the software and figuring out if I would shell out the cash for a future edition was a lot of fun. Check out the review on True Up.

Over at the EQ blog, I was asked to write a bit about how I designed my most recent project for American Patchwork & Quilting, Dot to Dot, using EQ6. Head over to the EQ Blog to read about the design and see a few Random Recolor experiments.

Monday, April 21, 2008

EQ6 Tip: Simulate satin stitching

Satin-stitch appliqué once reigned supreme in the world of machine appliqué, but today it often loses out in favour of machine blanket stitching and invisible-thread mock hand applique. I'm hoping to post a gallery of satin-stitch appliqué from my growing collection of vintage craft books soon, but for now I thought I'd share how I simulate this under-appreciated stitch in EQ6.

One of the benefits of appliqué with a satin stitch (or even a fairly dense zigzag) is that the heavy bead of thread gives a definite boundary to the fabric shapes. This can work wonders when you're appliquéing lots of busy and/or large scale prints, which have a tendency to blend into each other.

EQ6 lets you adjust thread colours and styles on screen so you can audition different effects on your blocks before sewing. Though more likely designed to approximate heavier quilting threads, the heaviest weight can be used on the edges of appliqués to check the look of satin stitches. With the Set Thread tool chosen, make sure the color, style, and weight boxes are ticked. I like to use the solid-line style with the heaviest weight to simulate a satin stitch.

The Thread Library is programmed with the actual colour numbers (and usually names) for several brands of thread. Because computer monitors can't precisely duplicate thread colours (much less textures), I don't make actual thread decisions until I'm holding the actual thread against the actual fabric, but I like adding threads to a project's Sketchbook once I've bought them to keep track of what colour numbers I'm using for a particular quilt. In the design phase, I just pick colours willy-nilly, ignoring the brands and fiber types indicated in the software.

Anyway, here's how a sample block looks by default, which none of the threads messed about with:


The skinny black lines show patch edges. You can print with or without them, but they're just there for guidance. Clicking the Set Thread tool (using the settings shown in the screengrab above) on each of the black lines gives you this:


I used three different thread colours, each a shade or two darker than the patch it surrounds. This gives me a pretty good idea of how my lemon slice would look appliquéd with a satin stitch. (It can be hard to click exactly on the thin lines; usually clicking within the patch, near the edge, does the trick.)

But maybe I want to try a contrasting thread instead to define the shapes even further. I can test that out easily too:


Here I used the same settings with a black thread to give the appliqué a cartoony look.

This simulated satin stitching works best when you're zoomed in pretty far—the thread doesn't read very heavy if you have a whole queen-sized quilt on your worktable. I like to try out satin stitches on individual blocks instead.

As for simulating blanket stitching, I haven't a clue. But my machine won't sew a blanket stitch, so I can't say I'm really bothered.

Wednesday, January 23, 2008

EQ6 keyboard shortcuts

One of the slightly annoying things about EQ6 for people who've used pro design software like QuarkXPress or Adobe Illustrator is the lack of keyboard shortcuts. Sure, there are some key commands (the help file and tips of the day list some), but it's hard to keep straight what the Ctrl key does when you're drawing a Bezier curve (turns it into a line segment), drawing a rectangle (makes it a square), or coloring a one-patch quilt (colors a whole line of patches).

But I wanted the to poke keys for everything EQ6 does! Rarely able to resist a tinkering challenge, I called AutoHotkey to the rescue. Now whenever I run EQ6, I run my AutoHotkey script too (you can download it below), adding the following keyboard shortcuts to the program:
  • Alt+B: Change to block worktable
  • Alt+Q: Change to quilt worktable

  • Alt+N: New horizontal quilt/EasyDraw block (depending on which worktable is active)
  • Alt+Shift+N: New on-point quilt/PatchDraw block
  • Ctrl+Alt+N: New variable point quilt/PatchDraw motif

  • P: Print quilt
  • Shift+P: Print fabric yardage
  • Ctrl+P: Print block
  • Ctrl+Shift+P: Print templates
  • Ctrl+Alt+P: Print rotary cutting sheet

  • Ctrl+B: Open Block Library
  • Ctrl+F: Open Fabric Library
  • Ctrl+L: Open Layout Library

  • + [plus sign on the number pad]: Add block/quilt to sketchbook (when viewing the worktable)
  • - [minus sign on the number pad]: Show sketchbook (same as F8)

  • Alt+Z: Suspend (or reactivate) hotkeys (to enter appliqué text etc. without triggering the commands)
If you already have AutoHotkey or are curious about the source code, download the script here. But even without AutoHotkey, you can run the script as a stand-alone executable. Whichever version you download, just double-click on the file to run it. The commands should only fire in EQ6 (unless you're looking at a web page with "EQ6" in the title; I'll fix this when I have a chance).

The key commands are free to use and adjust to your own preferences. PatchDraw tools are top on the updates list, along with better commands for starting fresh blocks and quilts—I'll upload new versions whenever I have 'em.

Hopefully other people will find the shortcuts useful—just being able to switch worktables without the mouse gives me a practically unholy delight every time!

The keyboard icon overlaid onto the EQ6 icon above comes from famfamfam.

Thursday, September 06, 2007

EQ6 Workaround: Save Appliqué or Piecing Templates

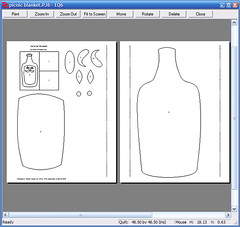
It sometimes takes a lot of work to get EQ6 to fit all your templates on one or two pages. When you hit Print, you start with something like this:
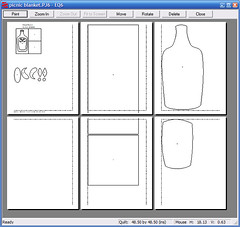

EQ6 templates: default


The background for this block I designed for a picnic blanket is pieced; I can rotary cut the rectangles, so I don't need templates for them. I got rid of them and nudged the other pieces around until everything fit on two pages (EQ6 still showed a third blank page, but it doesn't print the blanks):


EQ6 templates: laid out


So far so good. But to print the templates again, I'd have to start with the original layout. EQ6 doesn't offer a way to save templates, but here's a workaround to do just that. As an added benefit, your templates will be universally accessible, even to people who don’t have EQ. Really, it's just printing a PDF.


  1. Make sure your computer has a PDF printer driver installed. I use CutePDF. Macs usually let you save a PDF directly from the print dialogue, but if you had a Mac, you wouldn’t be using EQ6, would you? (That is, unless you were some kind of Parallels wizard.)

  2. Tell EQ6 to print your templates (File | Print | Templates). Double check that the settings (line width, key block, etc.) are how you want them.

  3. Click the Page Setup button, then click the Printer button. Choose the PDF printer.

  4. Back on the Print Template screen, press the Preview button. Arrange your templates how you like, rotating, moving, and deleting patches as necessary (click the buttons along the top, then click the patch you want to change. For deleting, you’ll need to press the Delete key on the keyboard when the patch is highlighted). Make sure to leave an adequate margin around the edge of the page—the PDF might fit everything fine, but the printer it ultimately sends to may not.

  5. Press Print. When the PDF driver prompts for a file name, choose a folder, name the file, and hit OK.

  6. When you print templates from the PDF, make sure the pages print at 100%—that is, without any page scaling. Adobe Reader often defaults to scale everything down to the printer margins, but you don’t want that here. There’s a drop-down on the Print dialog box to set it right.

These templates are all set for e-mailing to a friend, taking to the copy shop, or whatever.


EQ6 does have some frustrations, but it certainly makes quilting easier. Give it a go...