Pages

Thursday, November 06, 2008

Fly by Night quilt

3008609037

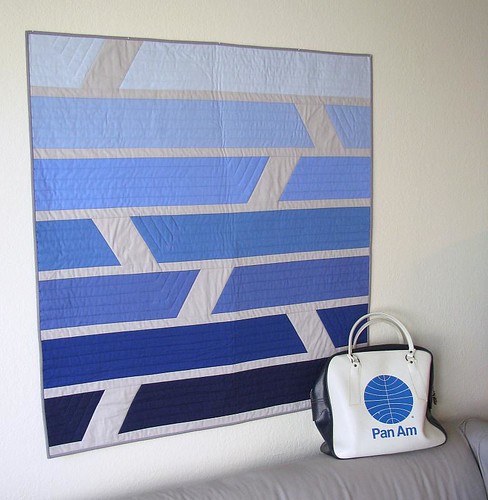
This is one of my earlier quilt designs, but I only just got round to making it. The idea came to me a couple years ago when I was flying somewhere at night. I'd been doing a lot of appliqué recently and was itching for an easy piecing project, so I finally got it cut, pieced, and quilted. I didn't even have to buy any fabric, since I'd had the stuff sitting around for ages!

It was a little odd to be working with just solids again, though I quite like the simplicity of it. And despite the pain of pivoting in the middle of the quilt, quilting it was fun. I love the texture of the straight quilting lines an inch apart, but I'm itching to build up my free-motion skills so I can do more. My sewing machine continues to be my BFF—the true miracle of dual feed is that you can use specialized feet when you're quilting, not just whatever foot is built into the walking foot. Pfaff's narrow-edge foot is fantastic for stitching in the ditch perfectly, and it's easy put on quarter-inch (finished size) binding when you can use a quarter-inch foot and the dual feed.

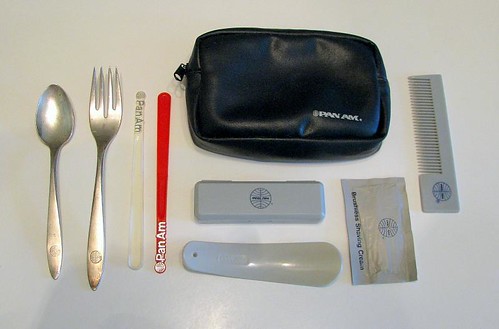
The quilt just happens to look smashing with the Pan Am bag the Other got me for my birthday last month. He also bought me a toiletry kit (to carry sewing bits) and some more airline cutlery:
3008609147

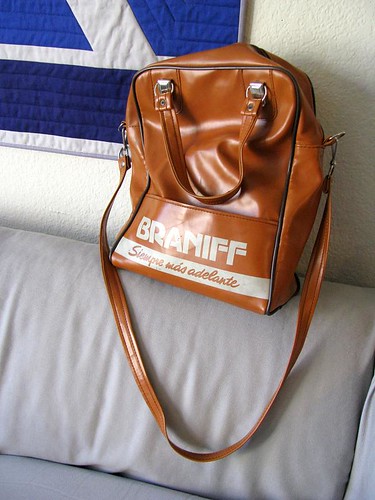
We've found quite a bit more cutlery recently, but I haven't got decent shots of them yet. The Other found me a nice set of Braniff dishes and a few bits of silver, which I'll also have to get a picture of. And speaking of Braniff, he gave me another lovely airline bag for my birthday too:
3009445448

I used it when the Mother and I hit PIQF and it made one of the vendor's day—I guess he had worked for Braniff back when, well, back when they existed. And the birthday joy just kept flowing as I filled the bag with fabric from the show care of the Mother's credit card. (She had to buy new luggage to get her own loot home, and it was quite a bit bigger than either of these bags.) Oh, and I think I made the Other buy me that narrow-edge foot as an early birthday present—I really am a spoiled brat. But thanks for a great birthday month, Other and Mother!

Now with all this airline paraphernalia, the Other and I may have to have a cheesy flight-themed dinner party—preferably wearing Space Bubbles.

Sunday, November 02, 2008

Please vote no on Proposal 8

I hope you'll forgive the brief political intrusion, but it's easy to think that political issues are abstract things that don't affect anyone personally. This isn't the case.

California's Proposal 8 would mean that the Other and I would not be able to share our lives the way any straight couple can choose to. Proposal 8 isn't about protecting marriage; it's about restricting it to only a certain type of people. If you really want to protect marriage, get a proposal on the ballot to eliminate the right to divorce—my ability to marry my partner doesn't invalidate or threaten anyone else's marriage.

God doesn't want discrimination. Yes, I know all about what the Bible says, and it's just as adamant that we don't eat pork or wear mixed fibers (though I run as far from poly-cotton blends as the next guy). Please don't be fooled into voting yes on 8 by the idea that it assures religious freedom. True religious freedom means that religious beliefs are personal beliefs, not law.

If you live in California, please vote no on Proposal 8. It may only be an abstract issue in your life, but it could mean very concrete and very real discrimination for me.

NO8-468x60-unfair

Tutorial: Freezer-paper circle appliqué for quilt labels

I had to quickly put a label on a quilt this week before sending it out into the world (more details on that later!). It seemed like a good opportunity to snap some pics for a tutorial on an appliqué method that uses freezer paper and starch and is a favourite of my quilt guild. It's a great technique for quilt labels, since the freezer paper stabilizes the fabric for writing on, and a circle cutter makes it even easier.

I wanted a round label so it would blend in with the bubbly fabric on the backing. That's where the circle cutter comes in.

freezer paper appliqué

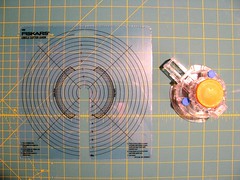
This circle cutter made by Fiskars was stocked with the papercraft supplies (I have used it to cut circles from fabric fused to fusible web—it dulled the blades and required a more careful movement but worked pretty well). There's a needle tip and a pad tip; use the needle tip. The guide is sold separately but helps find exactly where you're going to cut. The cutter blade tears up the mat a bit, so I use the cutting mat I use with X-Acto knives rather than the one I use to rotary cut fabric.

Materials

  • Fabric
  • Freezer paper
  • Iron
  • Circle cutter, guide, and cutting mat (or scissors)
  • Pinking shears
  • Spray starch
  • Paintbrush
  • Stiletto or chopstick
  • Ruler
  • Pen or marker
  • Light box or other bright light source
  • Fabric marking pen
Instructions
Click on any of the photos to zoom in.

  1. Iron 2 pieces of freezer paper together, shiny sides down. The doubled thickness is easier to wrap the fabric around.
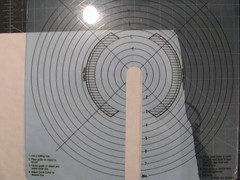
  2. Place the guide onto the freezer paper. I wanted a 3-inch circle. If you're making a shape other than a circle, draw it on the freezer paper, cut it out with scissors, and skip down to Step 6.
    freezer paper appliqué
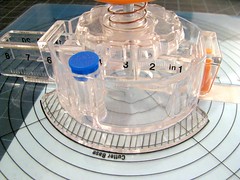
  3. Place the cutter on the guide, lining up the cutter's feet with the marked spots on the guide. Make sure the cutting blade is above the guide's open notch.
    freezer paper appliqué
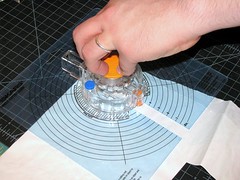
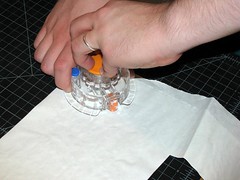
  4. Press down on the orange center of the cutter. While pressing, slide the guide out.
    freezer paper appliqué
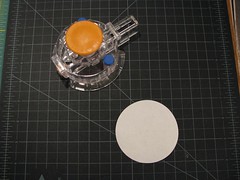
  5. Keep pressing and turn the body of the cutter around in a circle. You shouldn't have to apply much pressure. So, now you've got a perfect circle!
    freezer paper appliqué freezer paper appliqué
  6. Back to the ironing board. Press the freezer paper to the fabric, shiny side down against the back side of the fabric. (Your fabric doesn't have to be the same shape as the freezer paper at this point; I just happened to have a circle scrap.)
    freezer paper appliqué
  7. Cut around the freezer paper with pinking shears, just shy of ¼" from the edge of the paper. Or you can use scissors and clip into the seam allowance periodically, but the pinking shears cut out (geddit?) the clipping step and reduce fraying.
    freezer paper appliqué
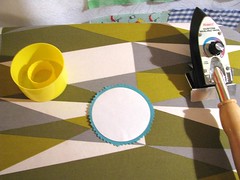
  8. Spray some starch into the cap of the can or another small container. Once the bubbles settle and the starch is a liquid, paint some onto the seam allowance. You can wet a few inches of the seam allowance at a time.
    freezer paper appliqué
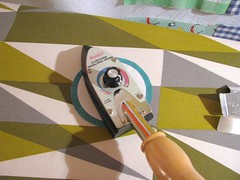
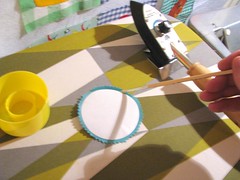
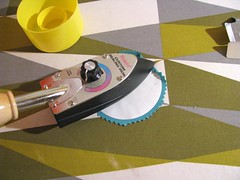
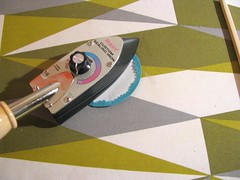
  9. Press the wet seam allowance over the edge of the freezer paper. A sealing iron like this one is easier to handle than a full-size iron, but anything works. Use a stiletto to pull the seam allowance down onto the paper—I wasn't about to spend $15+ on a sharp stick, so I just use a chopstick. You can't see the chopstick in the photo because I needed to hold the camera and don't have three hands (or a prehensile tail, which would really be preferable); it's generally easier to hold the stiletto/chopstick in your dominant hand. When you get near the end of the allowance you've wet, paint some more. If you get a fold or a point ironed in, just wet it and repress.
    freezer paper appliqué
  10. When you've pressed all the seam allowances down, give the whole piece a quick press.
    freezer paper appliqué
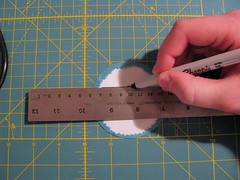
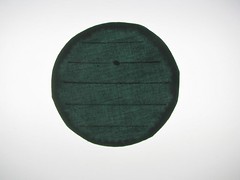
  11. Normally you'd remove the freezer paper now, but since we're making a quilt label, we're not done with it. To help keep your lines of label text straight, draw heavy lines on the freezer paper. I lined my ruler up with the half-inch marks on the cutting mat to keep them parallel and evenly spaced.
    freezer paper appliqué
  12. Chuck the thing on a light box. Or a bright window, or a glass table or clear box with a lamp under it. See how the lines peek through? So does the lovely blob my pen made while waiting for me to focus the camera. (I'm also noticing that my pressing job could have been better—I should have repressed those points on the edge. Instead I rounded them out when I was sewing.)
    freezer paper appliqué
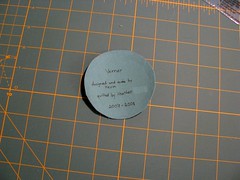
  13. Write your text with a fabric-marking pen, using the lines as guides. I can never get everything centered, but at least the lines are straight. Pop the label off the light box.
    freezer paper appliqué
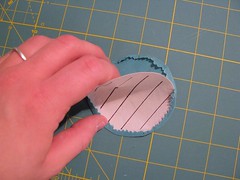
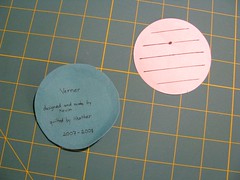
  14. Now you can peel the freezer paper out. The fabric will keep the circle shape.
    freezer paper appliqué
    How do you like them super-pink fingers? I'm having a little trouble getting my screen colour calibrated.
  15. And sew the sucker down! I sewed this one down by hand with a blind stitch, but sewing a label to a finished quilt, you can sew by machine with monofilament thread and a blind-hem stitch. Either way, I highly recommend basting glue over pins.
freezer paper appliqué

And that's it. You don't have to make the circles into labels, of course, but on the other hand, quilt labels don't have to be rectangles!

Friday, October 31, 2008

Happy Halloween

2990406664

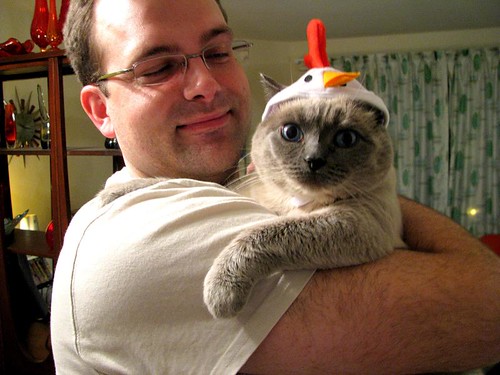
Embarrassing Felis Domesticus is about as festive as it gets over here.

Ugh, two cat posts in a row. I have a tutorial in the works—promise.

Thursday, October 23, 2008

Felis Domesticus and paramecium

Oh dear, I've been woefully neglectful of my online persona yet again. This time I shall blame the Mother, who invaded for a week and dragged me (kicking and screaming, of course) to PIQF and every quilt shop in the land. And to top it all off, she insisted on paying for all of my fabric—can you believe the nerve?

Felis Domesticus was on her best behaviour with the Mother, ignoring but eyeing her suspiciously her for days.

cat and paramecium

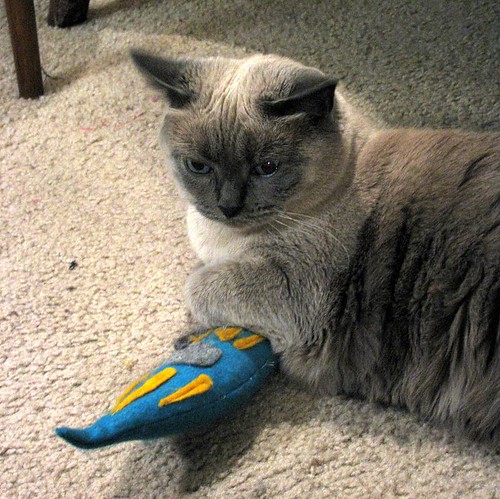
Here's the beast protectively clutching her paramecium toy. I found the felt microbe in a bag when cleaning and finished it up for her—it was a very early, abandoned sewing project—and she quite enjoys the wool flagellum and catnip-stuffed cytoplasm.

cat and paramecium, locked in combat

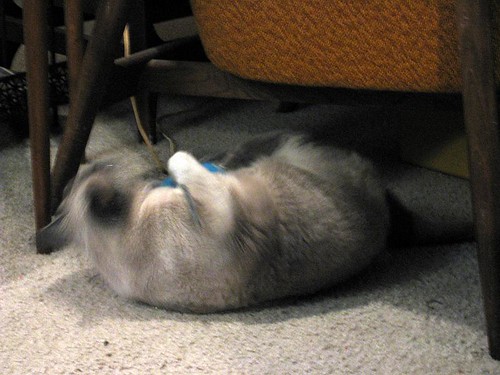
And here she is disemboweling the poor paramecium. The Mother eventually earned Felis Domesticus's affection by dangling the flagellum in front of her, and when they were finished playing Felis expressed her appreciation by licking the Mother's hair. Cats are gross.

Alas, Felis has been lulled into a very tentative sense of security, as the parents will soon be moving overseas and leaving their dog with us. Felis Domesticus ain't gonna be the only beast on the block for long....