Pages

Saturday, March 26, 2016

Bias applique roundup (and giveaway winner!)

For my giveaway of The Appliqué Book, I asked entrants to share an aspect of appliqué they were interested in learning about. Several people mentioned bias appliqué, which has its own section in the book. We’ll get to the giveaway in a second, but I thought I’d show some of my projects using bias-tape appliqué to give you some ideas about how this versatile technique can be used.

Cordova table runner from my book, The Quilter’s Appliqué Workshop
“La Fiesta” version of Grey Gardens
“La Costa” version of Grey Gardens
Cordova and my two Grey Gardens quilts use bias appliqué to make geometric patterns inspired by lowly concrete blocks. Deceptively easy to sew!

Helix table topper from The Quilter’s Appliqué Workshop
Retro Ring Placemats from 50 Fat Quarter Makes
For these table linens, I played with intertwining the bias strips to make free-form shapes.

Woven Waves table runner
Then I went totally crazy with the weaving for this runner I designed for a webinar a while ago. If you missed the webinar during the Sewing Party, you can now download it from my website to learn how to design and construct your own woven bias runner.

Giveaway!

The winner of a free copy of The Appliqué Book is commenter number 28, Jodi - usairdoll, who was interested in learning about reverse appliqué (as many of you were). Congratulations Jodi—I’ll be in touch shortly. Thanks to all who entered!

Craftsy sale

One last note...now through Monday, March 28, Craftsy is offering 50% off all their classes! If you’re getting your feet wet with appliqué, you’ll learn to find the right technique for you in my class, Start Appliqué, on sale for $19.99. Or use my affiliate link to take your pick from a myriad of other classes in quilting, sewing, embroidery, and more!


Tuesday, March 22, 2016

The Appliqué Book Blog Tour


I’ve been looking forward to The Appliqué Book for a long time, ever since author Casey York and I chatted all things appliqué over lunch at a quilt show we taught at a couple years ago. I’m honored to be included among the appliqué quilters profiled in the book, and delighted to be one of today’s stops on the blog tour!

Casey’s previous book, Modern Appliqué Illusions, thoughtfully explores unconventional ways to use appliqué to build a sense of perspective into quilts. What I love about The Appliqué Book is that it shows there really is no such thing as “conventional” appliqué: instead, there’s an infinite variety of approaches. Rather than being forced into some one-size-fits all standard, the projects in this book show the individual methods used by the designer, making each project a kind of case study of what can be done with a particular working style.

“Felt and Linen Improv Coasters,” Betz White
The diversity of technique in appliqué is rivaled only by its plethora of aesthetic possibilities, and the designers featured each bring a unique eye to the book. I love the the free-form stitching and the mix of wool felt and linen in Betz White’s coasters, and equally love the strikingly geometric Sweet Pickles quilt by Latifah Saafir (those bias strips are fussy cut!). It’s especially impressive that there’s extensive instruction to go with the wide range of projects and techniques. I always encourage students in person and online and readers of my own appliqué book to explore lots of different ways of doing things, and The Appliqué Book offers just that.

“Sweet Pickles,” Latifah Saafir
If you’re looking for appliqué inspiration, order a copy of the book now (you can even get a signed copy from Casey). Or try your luck at winning one! To enter the giveaway for a copy of the book from C&T Publishing (hard copy to U.S. winners; e-book for others), leave a comment on this post telling an aspect of appliqué you’re interested in learning more about. Entries close at midnight, March 25 (Pacific Time); I’ll announce the randomly chosen winner on March 26. Make sure your comment or profile has your e-mail address! Giveaway has ended. Congratulations to winner Jodi - usairdoll!

And for even more appliqué ideas, visit each of the blogs on the tour:

Mon. March 14:
Casey York | http://studioloblog.wordpress.com
C&T Publishing | http://www.ctpub.com/blog/

Tues. March 15:
Jenna Brand | http://jennabrand.com/
Adrianne Ove/Pink Chalk | http://www.pinkchalkstudio.com/blog/

Wed. March 16:
Jenifer Dick | http://42quilts.com/
Pati Fried | https://seehowwesew.wordpress.com/

Thurs. March 17:
Shannon Brinkley | http://www.thebottletree.net/blog/
Bari J. | http://barijdesigns.com/blogs/blog

Fri. March 18:
Debbie Grifka | http://eschhousequilts.com/blog
Beth Vassalo | http://plumandjune.blogspot.com

Mon. March 21:
Latifah Saafir | http://www.latifahsaafirstudios.com/blog

Tues. March 22:
Lynn Harris | http://thelittleredhen.typepad.com
Kevin Kosbab | http://feeddog.blogspot.com ← you are here

Web. March 23:
Allison Rosen | http://withinaquarterinch.com/
Cindy Lammon | http://hyacinthquiltdesigns.blogspot.com/

Thurs. March 24:
Rossie Hutchinson | http://www.rossiecrafts.com/blog
Generation Q | http://generationqmagazine.com/

Fri. March 25:
Betz White | http://betzwhite.com/blog
Casey York | http://studioloblog.wordpress.com

Tuesday, March 01, 2016

So what is Craftsy anyway?

Sometimes at my quilt guild we rattle off program names like block of the month, fat quarter drawings, and stash for cash work, forgetting that new members may not know how our programs work, or even what a fat quarter is. I’ve been talking about Craftsy a lot, and while you may be familiar with it if you read lots of craft blogs, you may not.

Here’s me on the set of my Craftsy class, Start Appliqué

Craftsy is essentially an online, video-oriented learning platform for all things creative. One of the big differences between a TV show or DVD is that there’s an interactive component to the classes: you can ask the instructor questions (and benefit from other students’ previous questions and the answers), share pictures of your work, and get inspired by other students’ work. Committing to answering students questions is part of what we instructors agree to when we sign on with Craftsy, so you won’t be asking into the wind.

I resisted taking online classes like this for a long time, since I tend to be a pretty conventional book learner. In high school, the AP classes I did best in were the ones with really solid textbooks, not ones where we watched films or did participatory group projects. So for learning quilting and craft techniques, my first port of call has usually been a book. But there are certain things that just don’t lend themselves that well to written description or static illustration.

Needle-turning

When writing my appliqué book, I found it really difficult to describe how do needle-turn appliqué. I hope I did a decent job, but as I found when teaching in person, it’s much easier to show students how to hold the needle, how to manipulate the fabric, and how to place their stitches than it is to write it out. And in my Craftsy class, you get that visual, in-person guidance with the added benefit of close-up camera shots and the ability to back up and rewatch until you really understand something.

My first bullion knot attempts, using different threads

Bullion knots occurred to me recently as a good way to make feet for my pigeon quilts. I’d seen the stitch demonstrated before but never attempted it myself. Now that I was picking up needle and thread, I needed to see it again. I could have sifted through dozens of YouTube videos of varying quality, but I knew Craftsy would give me quality, high-definition instruction from the best-known bullion knotter I can think of, Sue Spargo. So I enrolled in her class, watched the bullion knot section several times, and set to stitching. My first few knots weren’t quite right, so I repeated the segment again and immediately knew what I’d been doing wrong. Seeing the stitches actually forming was just what even an old-school book learner like me needed.

One of Sue’s class samplers—bullion knots are only the beginning!

While Sue was demonstrating a bullion knot edging, she pointed out that sometimes your loops don’t form quite right and showed how to correct them. Craftsy calls moments like these “troubleshooting,” and that’s another area where their teaching model differs from DIY TV. Advertising-driven television doesn’t like to dwell on what might go wrong; it just wants you to be carefree and happy and immediately run out to buy stuff. Craftsy instead is selling the instruction itself, so they want you to be confident that you’ll be able to handle any bumps that could come along when you put that instruction to use on your own. When instructors make mistakes on set, they usually keep shooting as we work through it, because those are often the exact trouble spots our students run into. (Though when we realized that I shot a whole segment without the machine threaded, we did have to start over—yes, the thread was supposed to be invisible, but not nonexistant!)

Craftsy wants their students to be happy, and they want their instructors to be happy too. I’ve worked with several craft-oriented media production companies, and Craftsy stands out as one that goes out of their way to make the behind-the-scenes process smooth, smart, and fun for everybody involved. If we’re enthusiastic about our experience, it’s a lot easier to make students enthusiastic about the classes they take! The company also recognizes that we instructors tend to be running very small businesses around the creative pursuits we love, so they help us out by giving us the chance to share in the profits of our own classes and any others we promote. So if you enroll through one of my affiliate links to, say, Sue Spargo’s embroidery class, you’ll get a discount and I’ll get a little money too. And that helps me be able to create more things to share with you!


To spread the joy even further and celebrate National Craft Month, Craftsy’s currently offering the chance for one student to win $1,000 for the craft-based charity of the winner’s choice! Depending on the number of new students who sign up, the donation will be doubled, so if you’ve never taken a Craftsy class, this is a great time to try it out! Since Craftsy offers full refunds if you aren’t happy, you have nothing to lose, and spectacular new techniques to gain for your quilting and crafting. The National Craft Month offer only runs until March 13, so click here to try a class today!

Monday, February 15, 2016

Good questions: sewing machines for beginners

Adjusting a Janome 8900 on the set of my Craftsy class

A visitor to my website recently asked me to recommend a good beginner sewing machine, and she specifically was interested in appliqué. In case anybody else has similar questions, I thought I’d share some of my experience with machines here.

My first advice would be to talk with an independent dealer (preferably one who stocks multiple brands), who will help you figure out the right machine for your plans and budget. I use a Janome these days, and I’ve heard good things about their entry-level machines, but there are plenty of other good makes out there. To some extent, you get what you pay for: the sub-$100 models in discount stores probably aren’t going to get you very far, though you needn’t start with one of the $10,000 numbers that has more in common with R2-D2 than with Grandma’s Singer. And keep in mind that you never know what you might find secondhand, though in my experience the best deals come when you aren’t looking.

In my ten years sewing, I’m on my third main machine:
  1. White 2037: an all-mechanical model with a good range of functions. The Mother bought it for me with the idea I’d sew some curtains and pillows, for which it was well suited. Had we had any idea I’d get into quilting, she might have picked a different machine, but the White did have a quarter-inch piecing foot standard, so it was easy for me to start piecing without extra accessories. I pushed the limits of the machine with appliqué, for which it was perfectly capable but lacking the bells and whistles to make things easier (see below).
  2. Pfaff 1171: I scored an incredible deal at a thrift store on this machine from 1986. At the time, sewing and quilting had become the better part of my job, so this workhorse machine was a godsend. The built-in dual feed was a major upgrade over a walking foot, and the needle-down function was a big help with appliqué. This machine hardly ever met a seam it couldn’t sew, and at the risk of sounding like a grumpy old man, they just don’t build them like that anymore. Sadly, a dodgy repair fried its motherboard.
  3. Janome 8900: this, my current machine, was the first one I carefully chose knowing the kind of sewing I do. I wanted to retain the Pfaff’s the power and reliability (reliable until it wasn’t, that is!), which led the dealer to recommend this machine. I spent several hours in the showroom with a very patient and knowledgeable dealer, who really listened to what I needed from the machine—my top advice is to find a dealer who wants you to be happy with your machine, not just a dealer who wants to sell you something. You’ll be able to tell the difference. While I’d never suggest choosing a machine because of how many decorative stitches it has, I was looking for an updated stitch selection, including the blanket stitch and appliqué blind hem that were missing from my Pfaff. This Janome came with a dual feed that was arguably more flexible than the Pfaff’s, it had a nice wide throat for quilting (most of which I do myself), and it feels cosmically in tune with me when free-motion quilting.
I used each of these machines for raw-edge and prepared-edge machine appliqué techniques. All the projects in my book were sewn on the Pfaff, and the Janome is what I now use at home and on camera in my Craftsy class.

An adjustable zigzag is really the bare minimum you need to do all kinds of machine appliqué. For a list of features that can make appliqué easier, take a look at this free excerpt from my book, The Quilter’s Appliqué Workshop. What machine features do you appreciate for appliqué?

Friday, November 27, 2015

What's on your playlist?

Thanksgiving isn’t a very big deal round here, mainly because our family is on the other side of the country. But the Other and I are always happy to have some time off from regularly scheduled programming, and though working for myself means never being caught up—there’s always some quilt I should be sewing, or a pattern I should be writing—I like to take advantage of the long weekends to indulge in my playlist.

Not a music playlist, but a crafting or needlework playlist. It’s easy to get caught up with whatever sewing I need to do for my work commitments, which takes away from the joy of creative exploration just for the fun of it. So I try not to let myself feel guilty when I work on projects that are just for play, and I always have an active “playlist” on the go of things I can pick up to work on when I just feel like sewing. Or embroidering. Or weaving. Or whatever—just creating.

But you don’t have to be a pro crafter to benefit from a playlist. Any kind of high-volume, deadline-based crafting can lead to burnout. Lots of quilters are extremely generous with their charity sewing, and this time of year especially handmade gift-giving obligations can get overwhelming. Even just feeling like every project has to be finished or have a purpose can take the fun away. I think taking a break for some play projects actually energizes the “work” sewing. Here’s some of my play. (Affiliate links included where appropriate.)

Needle threader shisha sampler

I add to this freeform shisha-embroidery sampler whenever the mood strikes, which is usually when I have new threads to try out. It lets me play with fibers and stitches without worrying that I might “ruin” something that has to get photographed for publication. But these experiments can and do lead to ideas that get used down the road, so it’s actually a useful exercise. Oh, and if you couldn’t tell, those are the tops of needle threaders instead of actual shisha mirrors. I’m fascinated by the different obscure faces on them but I don’t very often use a threader, so they might as well get stitched down!

Vintage bargello

I found this 1973 bargello needlepoint kit several years ago when visiting my parents. Embroidered with super-chunky yarn, it was already partially finished, so it was a relatively simple job to fill in the rest of the pattern. I just worked on it when I didn’t have appliqué or other handwork to do while watching TV. Maybe someday I’ll finish it into a pillow; maybe not. There are no obligations on the playlist!

Pigeon No. 1

I’ve mentioned my fondness for pigeons before. Correct me if I’m wrong, but I don’t think there’s a big market for pigeon quilt patterns, so this appliquéd pigeon was just for me and just for fun. Before starting him, I’d sewn a quilt of yarn-dyed stripes for Stitch, and though the quilt was simple, I’d loved sewing it because it was such fun to fondle all the woven fabrics. I wanted more, so I started amassing shot cottons and shirtings in enough shades of grey to make a pigeon. But he only suggested more pigeons: scruffy pigeons. Fat pigeons. Pigeons wearing top hats. Pigeons made of silk. A whole series of pigeons.

Pigeon No. 2

The second pigeon stayed with yarn-dyed cottons and continued my experimentations (in other projects) with irregular English paper piecing. I’ve been delighted with the exploding variety of yarn-dyes available, and was able to include some slubbier ones in this pigeon, as well as some extra tasty Oakshott Cottons. Some of the tiny triangles in his feet were fairly challenging, but that was part of the fun. (Obviously he still needs an eyeball.)

Use your playlist to explore a new craft—for me, weaving.

The Other’s keen eye for thrift-store bargains has netted me a range of secondhand looms, so my playlist also includes tinkering with weaving. Sewing, quilting, and embroidering share a lot of tools and methods, but weaving’s a whole other thing, which I have no training in—but learning about it really engages the creative juices. So I’m going to take advantage of this weekend’s Black Friday sales to stock up on some weaving instruction. Pickup Stick & Finger Control Techniques looks intriguing on Craftsy, where all classes (including quilting!) are on sale for $19.99 and under. And Interweave’s $5.99 ebooks and videos sounds like the perfect opportunity to indulge my curiosity in inkle weaving. I may be a quilter by trade, but one point of the playlist to encourage such indulgences—you never know where they might lead.

So what’s on your playlist?

Thursday, November 12, 2015

Irons for appliqué


I’ve had several students in my appliqué class on Craftsy ask about the mini iron I use and where to find one, so I thought I’d give a little info about a couple good options here. Any iron will do, but for small or detailed shapes, a smaller iron is easier to maneuver than a regular iron from the laundry room, and if you do a lot of appliqué with freezer paper templates and starch, it’s definitely worth the investment. If you can’t find one of these irons at your local quilt shop or fabric store, you can buy one online using the affiliate links below.


The actual iron I use in the class videos is a Dritz Petite Press, which is compact and lightweight, with adjustable angles for the head so you can position it most comfortably for you. I like a slender iron like this because it feels much more natural in the hand than a big clunky iron, so it’s easier to place precisely and move around along seam allowances. The weakness of this iron, though, is that it doesn’t quite get hot enough to easily press large freezer paper templates onto fabric, so I still have my full-size iron on hand alongside it.


An “iron on a stick” sealing iron like this one (often but not always branded as Hobbico) gets hotter and has a larger sole, so it reduces reliance on the regular iron for appliqué tasks. These are heavier than the Dritz ones, a good thing if you like a little more heft in your hand but not so good if you you have any hand troubles. The head is also fixed, so the handle angle is what it is. I’ve also seen heavy use by appliqué addicts burn out these irons, but you can extend their life somewhat by unplugging them to turn them off rather than ever turning the control knob to the off position.

I’ve personally used and been happy with both these irons, though there are certainly other options—many quilters have found travel irons that work well for them. Like any other appliqué tool, there’s no one-size-fits-all best; what works best for you is best. If you’ve used one of these or have another favorite iron for appliqué, please share your insights in the comments!

Monday, October 19, 2015

Mid-Century Monday: Mid-Century Mod quilts at PIQF

I attended the Pacific International Quilt Festival last week, and while it was primarily a shopping trip (first stop: delicious Oakshott cottons from Pinwheels!), I was pleasantly surprised to stumble upon an exhibition of “Mid-Century Mod” quilts. Here’re a couple I found most interesting.

Grandpa’s Model Twenty #1 by Jodi Robinson, Enon Valley, PA, awarded Best Interpretation of Mid-Century Theme
The quilter of this first one was inspired by a mid-century modern stereo system owned by her industrial-designer grandfather. Classic mid-century shapes that look cool and graphic.

American Modern by Carol Krueger, Louisville, CO, awarded Judge’s Choice
Lots of detail, including machine embroidery, in this one. It’s inspired by Russel Wright’s American Modern dinnerware, and both the colors and the motifs reflect that.

There was a vast range of interpretations of mid-century modern among the quilts in the exhibit, and it wasn’t until later that I realized what it was that drew me to these two: they both take their cues from modern decorative art and design rather than fine art. Though the call for submissions suggested quilters consider “the work of artists such as Joan Miro, Piet Mondrian, Victor Vasarely, Frank Stella, etc.”—i.e., mostly fine artists—it seems to me that mid-century modernism is really about the design of furniture, architecture, housewares, and graphics more than painting and sculpture. The Wikipedia definition concurs (for what it’s worth, none of the artists cited in the call for submissions are mentioned in the article, nor in its list of “additional mid-century modern architects, artists, and designers”). Modern art isn’t quite the same thing as mid-century design, though of course they’re connected.

But I guess that’s the beauty of exhibitions like this: they allow everybody to offer up their own vision of what a topic means to them, and we get to enjoy the eye candy that results. And there’s no denying that MCM design is fruitful territory!

Friday, September 18, 2015

Tips for appliqué with monofilament thread

My Craftsy class, Start Appliqué, launched this week! The student questions have started rolling in, and I’m not at all surprised to see that questions about monofilament thread were some of the first.

Often known as invisible thread, monofilament is a very fine, clear thread that’s, well, virtually invisible. Stitch down the edges of an appliqué shape with it, and you’ll pretty much never know the thread is there. Perfect!

Except when it’s not. Monofilament behaves differently from conventional threads because it’s made by a different process. Most threads are made from fibers twisted together into a thread with multiple plies, whereas monofilament is (literally) one long strand of extruded plastic. So the monofilament is usually springier and can be frustrating to work with when you’re used to conventional threads. Here are some tips for taming monofilament.

Use quality thread.


Bargain-basement brands can be stiff, thick, and harder to work with. This is one place where pinching pennies isn’t worth it. I use Sulky Invisible Thread—even the smallest spool has 440 yards, which will last a long, long time.

I use the clear thread for appliqué, but the smoke thread is shown in the photos below so you can see it better.


I recommend a polyester monofilament, mainly because it’s more heat resistant than nylon. It seems to me to be softer too, and it’s not supposed to yellow over time. But other teachers swear by nylon monofilament. See what you like best.


Pair it with the right needle and bobbin thread.


For the extremely fine thread, use an extremely fine needle: my machine likes a size 60/8 microtex (sharps) needle with the monofilament I use, but some students find better success with a 70/10. In the bobbin, use a lightweight cotton, around 60 weight. The texture of the cotton fibers can help grab the slick monofilament (or so I’ve been told!).

Aurifil’s 50-weight thread is 2-ply, so it’s similar in fineness to Mettler’s 60-weight fine machine embroidery thread.


Orient your spool properly.


The way thread is wound onto a spool determines which spool pin you should use: stacked spools on the vertical pin, cross-wound spools on the horizontal pin. Many threads will cooperate with either pin, but getting the orientation right for monofilament can vastly reduce tension and breakage issues. I made an infographic to explain this better and help you remember what spool goes where.

Thread Delivery Infographic
Click the image for a printable, high-resolution version you can keep near your sewing machine.

Read your manual and use your accessories.


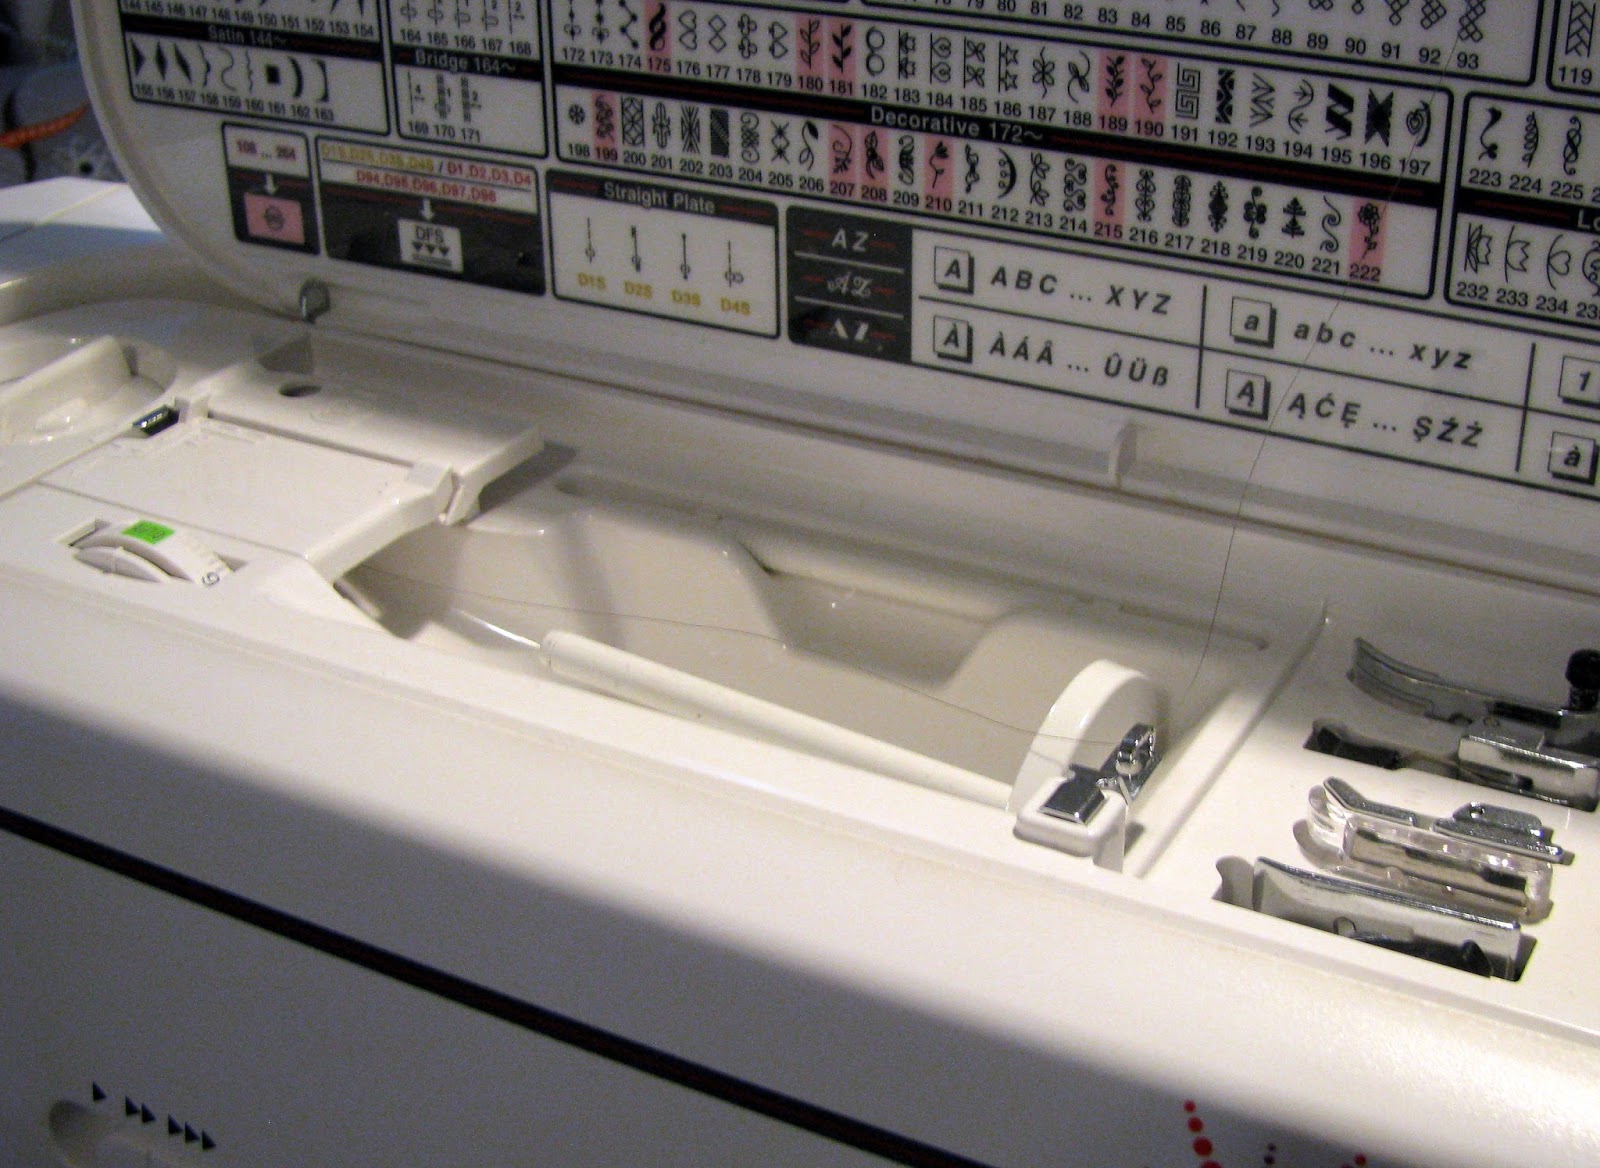
Make sure you’re using the right spool caps, cups, platforms, pads, or whatever came with your machine to help thread feed properly. One of the most common problems I notice when teaching machine appliqué is students not using the right accessories to mount their spools. This especially happens with vertical spool pins, where manufacturers often provide some sort of base for the thread to rest on. If you don’t use it, monofilament will almost certainly wind itself around the bottom of the pin, increasing the tension until the thread breaks.

As the thread feeds, it’s winding around the spool pin below the spool.

The lip of the spool cup lifts the thread away from the bottom of the spool.
Every machine is different, so check your manual for the right accessories and threading details.


Watch for snag spots.


The bounciness of the thread makes it prone to catching on any protruding piece of the machine. Even with the right mounting accessories, monofilament may get wound up on the base or tip of a spool pin, or snag on a threading guide—I’ve even seen it catch on part of a machine’s handle.

See how the thread’s wanting to coil around the tip of the spool pin? When sewing at speed, this can cause a royal tangle.


Make sure there’s a clear path from the spool to the threading and tension devices. As you’re sewing, if the thread starts to feel like it’s resisting and getting tighter, stop and check if it’s caught on something on the top of the machine. Because the thread’s meant to be invisible, it’s hard to spot when this happens, but you can usually feel it and sometimes correct it before the thread breaks.


Try a thread stand.


If your machine isn’t equipped with the right spool pin, or if the right spool pin still isn’t preventing snags, an external thread stand can guide the thread to the machine in a clearer, smoother path, and the extra distance between spool and threading device gives the monofilament space to relax a bit. I bought a thread stand that screws onto the back of my Janome 8900, and it’s usually the best place to feed my monofilament from.

If you look closely, you can see the kinks in the monofilament as it comes off the spool. See how much straighter it is when it comes back down to the machine (in front of the white spool)?

My machine uses a secondary threading guide with the thread stand, which helps keep the thread away from anything it could catch around.


Adjust your tension.


Monofilament is a different beast, so you’ll need to adjust your top tension. I usually lower mine to about 1; the goal is to not see any bobbin thread on the top. Don’t be deceived by machines claiming to make “automatic” tension adjustments—it might sometimes feel like your machine is smarter than you, but I assure you it’s not! The auto tension can’t tell that you’re using funky, nonstandard thread.

“I’m your tension dial, and I’m made to be adjusted!”


Monofilament makes appliqué easy and fast if know these secrets to making the thread behave. And that behavior is all about cooperation: your thread, your machine, your fabrics, and you yourself should be working together, and with all those variables, there’s no one-size-fits-all solution. Just be willing to experiment, and make a note when you find the settings and supplies that work best.

For more appliqué tips and a detailed lesson in how to sew invisible prepared-edge appliqué using monofilament thread, enroll in my Craftsy class, now with $10 off for blog readers!


Friday, September 04, 2015

Giveaway: my new Craftsy class!

If you follow my Facebook page or have stopped by my freshly redesigned website, you may have already heard the exciting news: I’ve shot a class with Craftsy, and it’s coming out soon!


In the class, I walk you through preparing and sewing appliqué in several different ways, by hand and machine, and I share lots of tips for making appliqué easy and fun. For each technique, we’ll sew a pear quilt block I designed specifically to include all the things you’ll run into when appliquéing, like curves, corners, and overlapping pieces.


One of the great things about Craftsy classes is that you can ask the instructor questions, so if you run into any trouble spots, I’ll be there to help you out, and so will your fellow students. And then you can post photos of your work so we can all ooo and ahh over them!

The class launches in a couple weeks. Until then, enter here for a chance to win the class for free! And stay tuned for more details.
Congratulations to Craftsy member gtcoursey, winner of the free class! Thanks to everyone who entered. Click here to enroll in the class for 25% off!

Monday, June 08, 2015

50 Fat Quarter Makes Blog Hop

Today it's my turn on the 50 Fat Quarter Makes Blog Hop! I'm posting late in the day because I'm busy (and having a blast!) teaching appliqué with Sandra Mollon at a week-long quilt retreat on Lake Tahoe. So I thought I'd share some of the beautiful scenery along with my projects from the book, which is filled with projects made from 1 to 10 fat quarters.


Quirky Pencil Case (2 fat quarters)


The diagonal zip gives this simple pencil case a bit of a twist. The second fat quarter makes the lining; the two fat quarters give you enough to make three pouches.

Striking Pocket Organizer (4 fat quarters)


Fussy-cutting symmetrical designs from the fat quarters makes the fabric the star in these simple wall pockets.

Retro Ring Placemats (6 fat quarters)


The freeform, interwoven bias rings are a version of the technique I'm demoing for the retreaters tomorrow morning! Designing the pair of placemats was kind of a puzzle to squeeze out two placemat tops, two backs, binding, and the bias strips from the six fat quarters while keeping a variety of fabrics in each mat.

Check out the book for another 47 fun projects, and keep following along with the contributor blog hop!

Monday, March 23, 2015

Mid-Century Monday: Verner Panton waves

http://click.linksynergy.com/fs-bin/click?id=d7vWf4mSHiA&subid=&offerid=266289.1&type=10&tmpid=10773&RD_PARM1=http%3A%2F%2Fwww.interweavestore.com%2Fop-art-runner-sewing-pattern

I just noticed my Op Art Runner pattern in the Sew Daily store, so I thought I’d share a bit of work by Verner Panton, which inspired the shapes and colors of the runner. Lots of Panton’s pattern design leds itself to patchwork—in this case, I built the curves out of Drunkard’s Path units.

textile design by Verner Panton, c. 1971 (via Quintessentia)
curtains, furniture, lighting, and rug by Verner Panton (via Panton World)
textile design by Verner Panton, c. 1969 (via Architonic)